
A Safe, Step-by-Step Way to Clear Hard-Water Spots From Auto Glass
Clean first. On compatible exterior glass, apply a 1:1 mix of white vinegar and distilled water, then rinse and dry. Repeat only if marks lighten without haze.
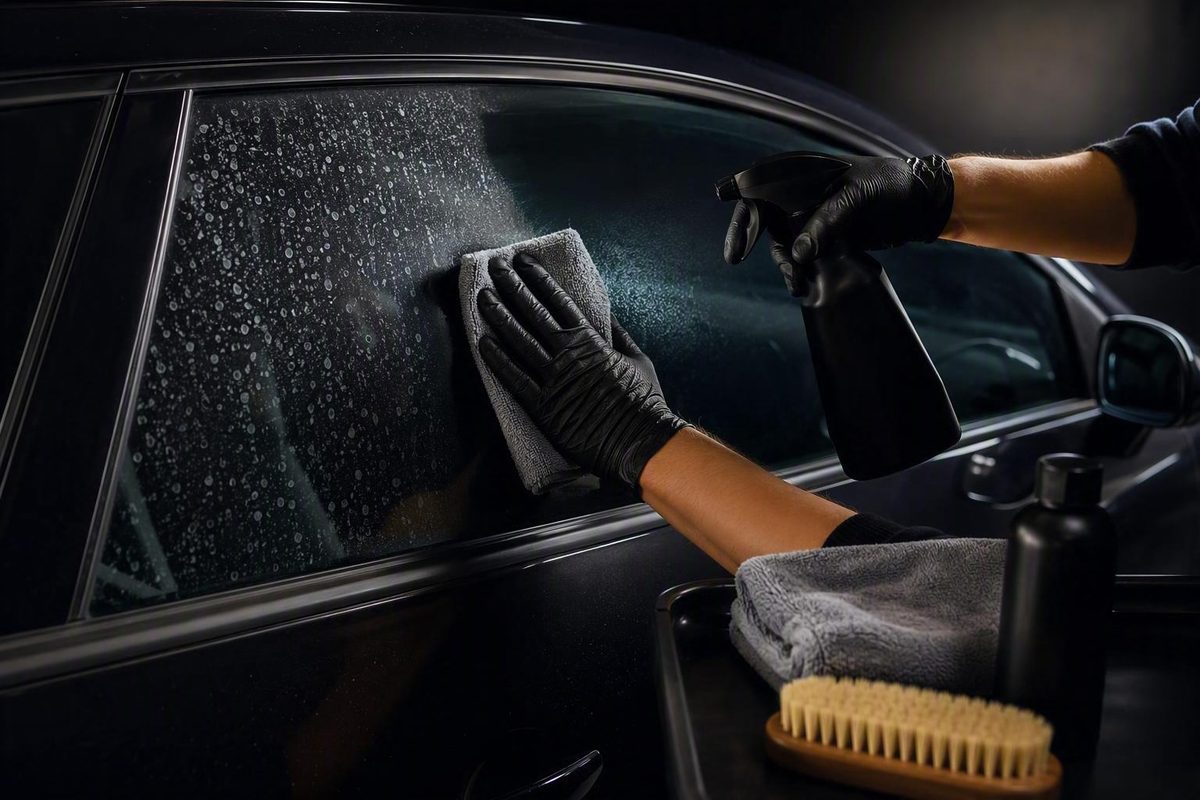
The quick answer: start with the gentlest effective method
If you are wondering how to get water stains off car windows, use this least-aggressive-first process:
- Park in the shade and let the exterior glass cool.
- Rinse or wash away dust, sand, and loose debris.
- Clean the window with automotive glass cleaner and a clean microfiber towel.
- Dry the glass completely and check whether the spots remain.
- If they do, mix equal parts white distilled vinegar and distilled water.
- Apply the mixture to a manageable section of eligible exterior glass.
- Keep the section damp for roughly five minutes without letting the solution dry.
- Wipe gently, rinse thoroughly, and dry with a separate clean towel.
- Inspect the dry glass from several angles before deciding whether to repeat or escalate.
The equal-parts mixture and approximately five-minute contact period are recurring commercial recommendations, not an independently proven optimum for every deposit or automotive-glass system. DFI describes the 1:1 mixture, five-minute application, rinse, and drying sequence.
In this guide, eligible exterior glass means either untreated exterior automotive glass or treated exterior glass whose manufacturer or installer has confirmed that the planned cleaner is compatible. If you cannot identify a coating, rain repellent, tint configuration, or other treatment, do not assume that a patch test alone establishes compatibility.
Inspect only after the window is completely dry.
Use improvement—not effort—as the stopping rule. If one controlled treatment clearly lightens the marks without creating haze or marring, one more careful application may be reasonable. If the dry result does not improve, do not press harder or scrub indefinitely. Move to a product specifically labeled for automotive glass or obtain a professional assessment.
What causes water spots—and why some marks do not wash off
Water spots commonly form when droplets evaporate and leave dissolved material behind. Calcium and magnesium are examples of minerals associated with hard-water deposits, although the composition depends on the water source. BLISS Car Wash explains the evaporation process and identifies calcium and magnesium as common deposit minerals.
Common exposure scenarios include:
- Wash or rinse water left to dry
- Rainwater residue remaining on the glass
- Repeated sprinkler overspray
- Regular washing with mineral-rich water
- Cleaner or rinse water that evaporates before being removed
For treatment purposes, the marks can be divided into three practical categories.
Fresh surface residue may respond to an ordinary wash or automotive glass cleaner. That is why normal cleaning should come before vinegar or any stronger method.
Stubborn mineral deposits remain after ordinary cleaning. A brief application of diluted vinegar or a remover explicitly labeled for automotive glass may loosen them.
Persistent marks do not respond meaningfully to gentle cleaning. They may involve remaining deposits, etching, another form of surface damage, or a combination of conditions.
A white ring, cloudy patch, or mark that reappears when the glass dries does not conclusively distinguish removable residue from damaged glass.
Instead, use the dry result to choose the next treatment:
- The glass becomes clear: Stop; no stronger method is needed.
- The marks become lighter: Some material responded, so one more controlled application may be reasonable.
- The marks remain unchanged: Stop treating them as routine residue and consider a labeled remover or professional assessment.
- The surface becomes hazy or visibly marred: Stop immediately.
These are treatment decisions, not diagnoses. Failure to respond to vinegar does not prove that a spot is etched, just as the age of a spot does not prove that it is permanent. Commercial guides report that persistent deposits can be harder to remove, but the available evidence does not establish a fixed timeline after which every water spot becomes irreversible.
Gather the supplies and prepare the glass
For the primary cleaning process, gather:
- Automotive glass cleaner
- White distilled vinegar
- Distilled water
- A clean spray bottle
- Several clean microfiber or lint-free towels
- Clean, preferably low-mineral rinse water
- Towels or coverings for controlling overspray around adjacent surfaces
Distilled water is useful because it avoids introducing another mineral load while you are trying to remove existing deposits. Reverse-osmosis water or another supply known to have low mineral content may also be practical.
Begin by rinsing or washing away loose dirt. Rubbing dusty or gritty glass increases the possibility of dragging debris across the surface. AutoZone’s windshield guidance likewise begins with a plain-water pre-rinse before automotive glass cleaner is applied. Its cleaning sequence covers pre-rinsing, automotive glass cleaner, microfiber wiping, and distilled-water rinsing.
After rinsing, use automotive glass cleaner and a fresh towel. Fold the towel so that several clean faces are available. Replace it if it falls on the ground or picks up visible contamination.
Work on cool glass out of direct sunlight. Shade gives you more control over the cleaner and reduces the chance that it will dry before you can wipe and rinse it.
Before using vinegar, identify the surface:
- Known untreated exterior automotive glass: Suitable for the procedure below.
- Coated or treated exterior glass: Proceed only if the coating, vehicle, or treatment instructions permit it.
- Interior glass with tint film: Do not automatically use the exterior procedure.
- Unidentified glass or treatment: Confirm compatibility with the vehicle manufacturer, installer, coating manufacturer, or cleaner maker before proceeding.
If you do not know which system is present, do not experiment with acidic or abrasive treatments.
Treat it as an additional precaution, not a substitute for product or manufacturer instructions.
Step by step: use diluted vinegar on remaining exterior spots
Use this procedure only after ordinary washing and automotive glass cleaner have failed to clear the marks.
Step 1: Clean the window normally
Rinse the exterior glass, wash away dirt, and apply automotive glass cleaner with a fresh microfiber or lint-free towel. Dry the window completely and inspect it.
This step removes residue that does not require vinegar and reduces the chance that loose grit will be dragged across the glass during spot treatment.
Step 2: Prepare the diluted vinegar
In a clean spray bottle, combine:
- One part white distilled vinegar
- One part distilled water
The 50/50 recipe is a commonly published commercial method rather than a concentration proven optimal for every type of glass or deposit. Rocket Car Wash also specifies equal parts white vinegar and distilled or bottled water.
Do not make the mixture stronger because the spots look old.
Step 3: Apply it to a manageable section
Treat the spotted portion of one eligible exterior window rather than saturating all of the vehicle’s glass and surrounding surfaces.
A small section is easier to keep damp, monitor, wipe, and rinse. Spray the glass directly only when overspray can be controlled. Near painted edges, rubber, or trim, applying the mixture to a towel first may offer better control.
Step 4: Allow a brief contact period
Keep the mixture on the spots for roughly five minutes without allowing it to dry. One commercial guide specifies about five minutes, while another permits contact for as long as ten minutes; this variation does not establish a universal optimum. DFI’s published process supports the shorter five-minute starting point.
If the mixture begins drying sooner, rinse it off. Move the vehicle into deeper shade, allow the glass to cool, and work on a smaller area rather than pursuing a longer contact time.
Step 5: Wipe gently
Use a clean microfiber or lint-free towel with light, even pressure. The objective is to remove loosened residue, not to scour the marks away.
Turn the towel frequently and replace it if it collects visible dirt. Do not continue rubbing a section after it has dried.
Step 6: Rinse thoroughly
Rinse the treated glass with clean water to remove vinegar and loosened material. Distilled, reverse-osmosis, or another reliably low-mineral water supply is preferable when practical because it is less likely to leave a fresh mineral deposit.
Also rinse accidental splashes from adjacent surfaces promptly. Controlling contact and runoff is a conservative precaution because the available general guidance does not establish compatibility with every paint, trim, rubber, or coating system.
Step 7: Dry completely and inspect
Dry the glass with a separate clean towel. Inspect it from several angles and under more than one lighting condition.
Do not judge the result while the surface is wet. Wait until the glass and its edges are fully dry.
If the first treatment clearly reduces the marks and the surface remains clear, one more controlled application is more prudent than immediately introducing an abrasive method. If improvement stalls, stop rather than prescribing unlimited repetitions.
A photograph of the dry test area before and after treatment can make subtle changes easier to compare.
Evaluate the result before trying anything stronger
Once the glass is dry, use the result to choose the next step.
| Dry result | Appropriate response |
|---|---|
| The glass is clear | Stop. No stronger treatment is needed. |
| The spots are noticeably lighter | Repeat one controlled, low-pressure treatment if the surface remains clear. |
| The marks are unchanged | Rinse again to rule out process residue, then consider a labeled automotive-glass remover or professional assessment. |
| Haze, marring, or changed coating behavior appears | Stop and obtain product-specific or professional guidance. |
| Windshield spotting is widespread or interferes with the driver’s view | Avoid further experimentation and arrange an assessment. |
If rings disappear when wet and return when dry, the surface remains optically different in those areas. That behavior does not prove etching.
Before escalating, rinse once more with clean, low-mineral water and dry with fresh towels. This helps rule out residue introduced during cleaning.
Do not increase pressure because the stain is old.
Use a lower threshold for professional help on a windshield than on a small rear side window. Clear driver visibility is a safety concern, not merely a cosmetic preference. AutoZone identifies visibility as a concern and recommends professional treatment for severe or persistent windshield staining. Its windshield-stain guide discusses both visibility and professional escalation.
Seek an assessment when:
- Marks cover a large part of the windshield
- Glare or sunlight makes the marks interfere with the driver’s view
- The dry result remains unchanged after controlled low-risk treatment
- The glass has haze, scratches, chips, or visible marring
- An existing tint, coating, or treatment cannot be identified
- You are considering corrective polishing without relevant experience
The goal is not to exhaust every household remedy. It is to restore clarity without turning a deposit-removal task into a larger glass-restoration problem.
Escalation options: commercial remover, clay, polish, or professional restoration
When diluted vinegar is not enough, rank the alternatives by suitability and risk rather than treating every remedy as equivalent.
1. Use a remover specifically labeled for automotive glass
Choose a product whose label explicitly permits use on automotive glass and on the particular treated or untreated surface involved. A general reference to “glass” or “windows” does not necessarily establish suitability for every automotive application.
Because formulations differ, follow the product’s directions for:
- Surface preparation
- Contact time
- Applicator or towel selection
- Required wiping or agitation
- Rinsing and drying
- Personal-protection measures
- Compatibility restrictions
BLISS Car Wash’s guidance likewise directs readers to follow the manufacturer’s instructions for commercial water-spot removers because products vary. Its guide distinguishes a labeled commercial remover from the basic vinegar method.
Confirm compatibility before treating coated glass, and inspect the surface after it dries. Do not exceed the product’s directions merely because the first application fails to produce a clear result.
2. Treat baking soda as an uncertain abrasive alternative
Baking-soda paste appears in commercial how-to guides, but the supplied evidence does not establish that it is more effective than diluted vinegar or a product formulated for automotive glass. It also introduces mechanical abrasion.
For those reasons, it is not the default next step. Skip it unless the relevant vehicle, glass, or treatment guidance permits it. Do not assume that a household ingredient is automatically nonabrasive or suitable for coated automotive glass.
3. Approach detailing clay cautiously
Detailing clay is disputed for this problem. Some guides and vehicle owners recommend lubricated clay, while others question whether it removes mineral deposits effectively and warn about possible marring.
It does not follow that every visible water mark consists of contamination that clay can remove. A Team-BHP discussion documents conflicting experiences with clay, acidic treatments, polishing, and professional detailing, but forum reports are anecdotal rather than validated compatibility guidance.
If you are considering clay, verify that both the clay and lubricant are approved for the specific glass and any coating present. Use light pressure and stop if the clay catches, haze appears, or the dry result fails to improve.
4. Reserve brushes and polishing compounds for higher-risk escalation
Do not substitute a stiff brush, abrasive kitchen pad, or unspecified polishing product simply because a microfiber towel did not work.
Use only a product explicitly approved for the relevant automotive glass, coating, and application method. Do not apply paint polish to glass unless the product manufacturer permits it, and do not repeat polishing indefinitely when the dry result is unchanged.
The evidence supplied here does not establish that polishing will remove every persistent or etched mark. When the appropriate product or technique is uncertain, professional assessment is the safer escalation.
5. Use professional glass restoration as the endpoint
Professional assessment is appropriate when:
- Careful DIY treatment stops producing improvement
- Marks cover an extensive area
- Surface damage is suspected
- A coating or treatment cannot be identified
- Earlier attempts have produced haze or marring
- Windshield clarity is compromised
Neither polishing nor replacement should be prescribed solely from a mark’s age or appearance.
Safety notes for tint, coatings, seals, trim, and paint
The vinegar procedure in this article is for eligible exterior automotive glass. Do not automatically apply it to interior tint film.
Consult the relevant manufacturer, installer, or vehicle instructions before using vinegar, an abrasive material, or a commercial water-spot remover.
The available general guides do not establish universal compatibility with every:
- Tint film
- Factory glass treatment
- Ceramic or other glass coating
- Rain repellent
- Rubber seal
- Plastic or metal trim
- Paint or clear coat
For that reason, unidentified treated glass is not eligible for the vinegar procedure until compatibility has been confirmed. An inconspicuous test may reveal immediate discoloration or haze, but it cannot replace the applicable care instructions.
Control overspray, avoid unnecessary or prolonged contact with adjacent paint, trim, and rubber, and promptly rinse accidental splashes. These are conservative precautions rather than guarantees of compatibility.
Use products intended for automotive glass instead of assuming that any household window cleaner is appropriate. The supplied retailer guidance warns that household cleaners may contain abrasive ingredients and recommends automotive-specific glass products.
Avoid improvised use of:
- Household scouring powders
- Abrasive kitchen pads
- Stiff brushes
- Unspecified metal or paint polish
- Compounds not approved for glass
- Strong acidic products without compatibility instructions
Stop if you see haze, scratches, marring, discoloration, or altered behavior on treated glass. Also stop when there is no measurable improvement. Continuing simply because a method has not worked is not a controlled escalation strategy.
If the windshield is heavily spotted or its existing treatment cannot be identified, consult an automotive-glass or detailing professional rather than experimenting with successively stronger materials.
How to prevent hard-water stains from returning
Prevention mainly involves removing mineral-containing water before it can evaporate on the glass.
Dry the glass promptly after washing. Use clean microfiber towels or a suitable automotive squeegee. Work systematically and replace a towel if it picks up dirt. Leaving beads to evaporate recreates the conditions that formed the deposits.
Use a low-mineral final rinse when practical. Distilled or reverse-osmosis water can reduce the amount of mineral material left behind. Do not treat every filtered or softened water supply as equivalent to mineral-free water.
Wash and dry out of direct sunlight. Shade and cool surfaces give you more time to rinse and dry before water or cleaner evaporates. If the vehicle cannot be moved, work in smaller sections.
Avoid predictable sprinkler exposure. Repeated overspray can deposit mineral-rich water on the same windows and panels. Adjust sprinkler direction, change the parking location, or move the vehicle before scheduled watering.
Keep drying tools clean. Store microfiber towels where they will not collect grit and replace any towel that becomes visibly dirty during drying.
Address developing spots promptly. Commercial guidance reports that older or persistent deposits may be more difficult to remove, although it does not establish a fixed timetable for permanent damage.
Consider a compatible protectant. A glass protectant or rain repellent may reduce how readily residue adheres, but it cannot guarantee permanent prevention. Confirm compatibility with existing treatments and follow the product’s preparation and maintenance instructions.
Good rinsing technique can also help remove loose dirt before contact washing and drying. For general wash setup rather than water-spot-removal evidence, see Car Cleaning Zone’s guide to spray nozzles and vehicle-rinsing technique.
Frequently asked questions
Is vinegar safe for every type of car window?
No. The procedure is limited to known untreated exterior automotive glass or treated exterior glass for which compatibility has been confirmed.
Do not automatically use it on interior tint film, unidentified coatings, or unfamiliar glass treatments. Check the relevant vehicle, tint, coating, or cleaner instructions first. A patch test is an additional precaution, not proof of universal compatibility.
How long should vinegar stay on exterior car glass?
Use the brief contact period specified in the procedure above, keeping the section damp throughout. Do not let the mixture dry.
Published commercial instructions vary from a few minutes to as long as ten minutes. That range does not establish that longer contact is better. If evaporation begins early, rinse the section, cool the glass, and work in a smaller area rather than extending treatment.
Can old water spots be removed completely?
Sometimes, but complete removal cannot be promised. An older mark may include removable mineral buildup, surface damage, or both.
Judge the dry result rather than trying to diagnose the mark by age or appearance. Clear improvement supports one further controlled treatment; no meaningful change is a reason to stop and obtain an assessment, not proof by itself that the glass is permanently etched.
Should I use baking soda, a clay bar, or polish on water spots?
None is a first-line method. Begin with rinsing, ordinary automotive glass cleaner, and the controlled diluted-vinegar procedure on eligible exterior glass. If that fails, a remover explicitly labeled for automotive glass is the more orderly next step.
Clay receives conflicting recommendations and may mar the surface if the product, lubrication, or technique is unsuitable. Polishing is corrective work that requires an approved glass-specific product and appropriate technique. For widespread or visibility-obstructing marks, professional restoration is preferable to testing several abrasive methods in succession.
When should I take a spotted windshield to a professional?
Arrange an assessment when the marks are severe, widespread, unchanged after controlled low-risk treatment, or interfering with the driver’s view. Professional help is also appropriate if the windshield has haze, scratches, chips, an unidentified coating, or marring from an earlier attempt.
Clean first, use one controlled equal-parts vinegar-and-distilled-water treatment on eligible exterior glass, rinse, dry, and evaluate. Escalate only when the dry result justifies it. Force is not a substitute for diagnosis: when marks remain unchanged, cover a large area, or obstruct the driver’s view, professional glass assessment is safer than repeated scrubbing or an unverified abrasive treatment.