
How to Build a Safer Brush Kit for Every Part of Your Car
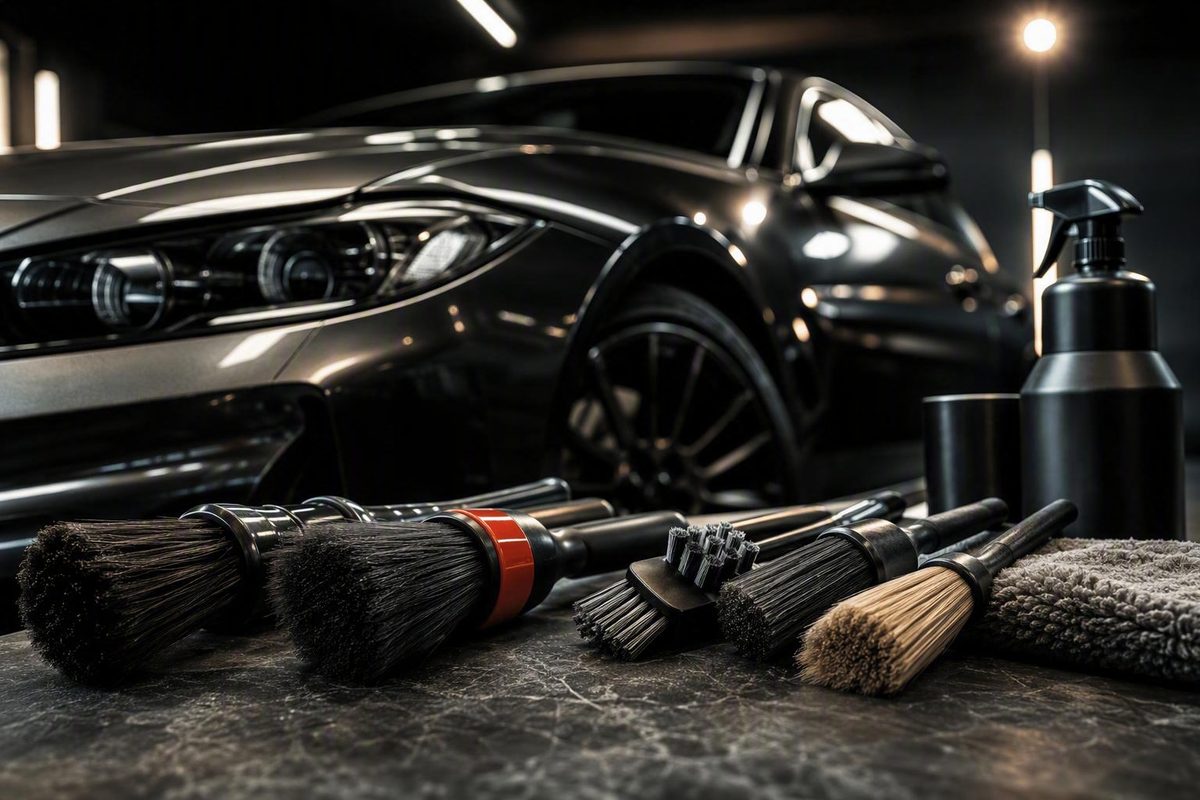
A practical starter kit has five functions: ultra-soft interior, clean-zone crevice, wheel-face, wheel-barrel and dedicated tire brushes.
By Marco Reyes, a former professional car detailer with a decade of experience.
Editorial note: This guide synthesizes manufacturer, retailer, marketplace, and enthusiast guidance supplied for review. No named brush was independently tested for scratching, chemical resistance, cleaning efficiency, shedding, or long-term durability. Product claims are therefore treated as seller positioning rather than guarantees.
“Detail brushes” can also describe tools for art, cosmetics, and household cleaning. Here, the term means automotive detail brushes used on vehicle interiors, exterior trim, paint, leather, carpets, wheels, tires, fender wells, crevices, and engine bays.
The best brush is not necessarily the softest, stiffest, largest, or most expensive. It is the least aggressive tool that can clean the specific surface and contamination while fitting the available space. A practical kit combines gentle brushes for sensitive finishes, robust brushes for dirty durable areas, and strict separation between work zones.
Before following any recommendation, inspect the finish, read the cleaner and vehicle instructions, and test an inconspicuous area. Labels such as “ultra-soft,” “boar hair,” or “chemical-resistant” are useful clues—not universal safety guarantees.
Start Here: Match the Brush to the Surface and Soil
Choose a brush by answering five questions:
- What is the surface? A screen, coated leather, carpet, tire, and wheel barrel have different tolerances.
- How sensitive is its finish? Gloss-black trim generally warrants a more conservative approach than textured rubber.
- What contamination is present? Loose dust needs less agitation than embedded grime.
- How much clearance is available? Head diameter, bristle length, handle shape, and overall length matter in vents, lug holes, and behind spokes.
- Will the brush encounter chemicals? Verify the brush and surface against the cleaner’s instructions rather than assuming broad resistance.
Commercial detailing guidance commonly organizes brushes by surface sensitivity, contamination, stiffness, size, shape, and chemical exposure. It also distinguishes small round tools for confined areas from long wheel brushes and broad scrub brushes for larger surfaces. These categories help with selection, but inspection and testing remain essential.
| Vehicle area | Surface sensitivity | Common contamination | Suggested bristle category | Stiffness | Useful head shape | Wet or dry method | Primary precaution |
|---|---|---|---|---|---|---|---|
| Screens and piano-black trim | Very high | Dust, fingerprints | Clean ultra-soft synthetic or similarly gentle specialty brush | Ultra-soft | Small round or compact broad head | Prefer dry dusting; damp cleaning only if approved | Test first, use minimal pressure, and never assume scratch-free contact |
| Dashboards and vents | Medium to high | Dust, light residue | Soft synthetic, horsehair, goat hair, or another suitable soft fiber | Soft | Small round, mini, or long narrow | Dry for loose dust; damp with compatible cleaner for grime | Keep liquid away from switches and electronics |
| Leather | Varies by coating and condition | Body oils, transferred dirt | Horsehair or appropriately soft leather brush | Soft to medium | Broad, compact head | Usually damp with an approved leather cleaner | Confirm compatibility with the finish and avoid saturation |
| Carpet and mats | Low to high, depending on fiber | Sand, soil, stains, hair | Synthetic hand brush; powered brush only on confirmed durable material | Medium to stiff | Rectangular or rounded scrub head | Vacuum first, then wet-clean as appropriate | Test for fuzzing, distortion, or color change |
| Badges and exterior crevices | Medium to high | Road film, wax residue, grime | Soft synthetic or suitable natural brush | Soft | Small round or mini | Wet and lubricated | Pre-rinse where appropriate and keep hard construction away from paint |
| Coated paint | High | Light film around seams and badges | Clean ultra-soft or flagged synthetic | Ultra-soft to soft | Small round | Wet and well lubricated | Remove loose grit first; do not scrub dry |
| Wheel faces | Varies; gloss black can be highly sensitive | Brake dust, road film | Soft flagged synthetic or wheel-safe face brush | Soft to medium | Rounded or broad face brush | Wet | Test sensitive finishes and use a wheel-dedicated brush |
| Wheel barrels | Medium, but access is difficult | Brake dust, road grime | Synthetic barrel brush | Medium and flexible | Long, narrow, cylindrical, or spiral | Wet | Check spoke, rotor, caliper, and barrel clearance |
| Lug holes | Medium | Brake dust, cleaner residue | Wheel-dedicated small synthetic brush | Medium | Mini round | Wet | Keep hard or exposed edges away from the finish |
| Tires | Lower relative sensitivity, though rubber condition varies | Browning, old dressing, road grime | Robust, flexible synthetic | Medium to stiff | Contoured or rectangular | Wet | Choose enough bite rather than maximum stiffness by default |
| Fender wells | Usually durable, but liners differ | Mud, road grime | Stiff synthetic or durable large brush | Medium to stiff | Long-handled rectangular or rounded | Wet | Check for loose liners, painted areas, and nearby components |
| Engine-bay components | Mixed: durable and sensitive areas coexist | Dust, oil, greasy residue | Chemical-compatible synthetic for selected durable parts | Soft to stiff by component | Small round plus larger utility brush | Controlled damp cleaning | Protect sensitive electrical areas and follow product instructions |
The interior and sensitive-trim rows reflect commercial recommendations for soft brushes on dashboards, vents, displays, controls, and delicate finishes. Those recommendations do not prove that a particular brush is safe on every material, especially a soft display coating or gloss-black panel. Work Stuff’s guide illustrates how sellers divide brushes by surface and contamination level.
The exterior, wheel, tire, and engine-bay rows similarly reflect task-based commercial guidance: pre-clean loose contamination, use lubrication where appropriate, isolate dirty brushes, and reserve firmer tools for confirmed durable materials. Guidance covering coated paint, leather, wheels, tires, and engine bays also emphasizes matching stiffness and shape to the specific task rather than treating one brush as universal. Titan Coatings’ brush-kit guide documents this application-based approach.
This matrix is a starting point, not permission to treat every example in a row identically. A matte display, soft clear-plastic gauge lens, damaged leather coating, aftermarket wheel finish, or repainted engine component may react differently from an apparently similar surface.
The fastest selection rule is:
- Sensitive surface: use a clean, soft brush, minimal pressure, and a test spot.
- Confined area: reduce head diameter before increasing force.
- Heavy grime on a durable surface: increase agitation only after confirming material and cleaner compatibility.
Maximum stiffness is not maximum effectiveness. On a tire, flexible bristles with sufficient bite may conform to lettering and sidewall texture more effectively than an extremely rigid brush. Elsewhere, useful contact and controlled agitation matter more than stiffness alone.
Bristle Materials Explained: Synthetic, Boar Hair, Horsehair, and Stiff Fibers
Bristle labels narrow the choice, but material alone does not determine safety.
Synthetic bristles
Automotive brushes may use nylon, polyester, PET, or PBT. These polymers can differ in hardness, elasticity, and tolerance of heat or solvents, but the supplied sources do not establish a standardized cross-brand performance scale. Eastwood’s material overview identifies nylon, PET, and PBT alongside common natural fibers.
Ultra-soft and flagged synthetic brushes are commonly marketed for dashboards, vents, displays, emblems, coated surfaces, and delicate trim. Flagging splits or refines the filament ends to create finer tips. That may produce softer, denser contact and help a brush reach textured surfaces, but it does not prove safety on every screen, coating, or gloss-black panel.
Sellers also position synthetic bristles as durable and relatively tolerant of detailing chemicals. Treat this as a category-level tendency, not permission to expose any brush to any acid, solvent, degreaser, or wheel cleaner. Follow the product instructions, rinse the tool after use, and inspect it before its next task.
Boar hair
Boar hair is not a standardized stiffness category. One boar-hair brush may be soft and densely packed; another may be comparatively firm or cut shorter for greater agitation. Retailers assign boar hair to tasks ranging from interior dusting and leather to jambs, lug areas, and dirtier exterior work.
That inconsistency means “boar hair” cannot answer the buying question by itself. Examine the stated stiffness, head construction, and intended application, then test the actual brush. Do not assume natural bristles are automatically gentler than synthetic ones.
Horsehair, goat hair, and other natural fibers
Some commercial sources recommend horsehair for leather because a broad, gentle head can spread pressure and work cleaner through the grain. The recommendation remains conditional on the upholstery finish, its condition, the cleaner, brush cleanliness, and technique.
Goat hair is generally positioned for soft dusting and delicate work. Plant fibers tend to occupy the firmer end of the natural-fiber range and may be assigned to rubber, carpet, or other durable materials. These are commercial use categories rather than independently verified safety limits.
Stiff synthetic and plant-fiber brushes
Reserve firmer brushes for surfaces that can tolerate stronger agitation: confirmed durable carpet, rubber mats, tires, wheel arches, and selected robust engine components. Even in those areas, start with the least aggressive grade likely to work.
Metal bristles—including brass and stainless steel—are aggressive tools, not general-purpose automotive cosmetic brushes. Use them only for a narrowly defined material and procedure supported by the relevant product or component manufacturer.
Brush terminology
- Flagged tips: Filament ends split or processed into finer tips, generally creating softer, denser contact.
- Bristle stiffness: Resistance to bending. It depends on material, filament diameter, length, density, and construction—not merely a “soft” or “stiff” label.
- Chemical resistance: The ability of the filament, adhesive, collar, and handle to tolerate a particular chemical exposure. It is not universal chemical compatibility.
- Natural-bristle shedding: Loss of animal or plant fibers. A promotional source describes limited early shedding as break-in, but no supplied evidence defines a threshold separating normal shedding from a defect.
- Stiffness scale: No standardized cross-brand scale appears in the supplied guidance. “Soft,” “medium,” and “stiff” are most useful within one manufacturer’s range, not as precise comparisons between brands.
Choose Brushes by Vehicle Area
A useful kit is organized around work zones. This improves fit and cleaning efficiency while reducing the chance that brake dust, tire grime, degreaser, or oily residue reaches a sensitive interior or painted panel.
Interiors: separate dry dusting from wet cleaning
For loose dust on vents, buttons, instrument panels, and delicate plastics, use a clean soft brush dry, ideally while holding a vacuum nozzle nearby to collect released dust. For adhered grime, apply an approved cleaner according to its directions—often to the brush or towel rather than directly into controls—and use controlled agitation.
Do not casually alternate one brush between dry dashboard dusting and dirty wet work. A tool that appears clean may retain cleaner, dressing, grit, or moisture deep in its bristles. Separate brushes are sensible when tasks have different contamination profiles.
Screens and piano-black trim deserve the most conservative approach: clean ultra-soft bristles, minimal pressure, and an inconspicuous test. If the vehicle manufacturer specifies a microfiber cloth or prohibits cleaner on a display, follow that instruction instead. No bristle label creates a universal scratch-free guarantee.
Leather
Choose a gentle horsehair or appropriately soft specialty brush with a head broad enough to distribute pressure. Vacuum seams first, test the cleaner and brush on a hidden area, and agitate lightly instead of repeatedly scrubbing one spot. Commercial interior-brush ranges commonly position horsehair for leather while separating it from stiffer carpet and upholstery tools. Chemical Guys’ interior category shows this progression from soft detailing brushes to horsehair and heavier scrub tools.
“Leather” can refer to different coatings and constructions. Confirm that the cleaner and brush suit the specific upholstery. If the finish is cracked, sticky, peeling, recolored, or otherwise compromised, stop and reassess before increasing agitation.
Carpet, upholstery, and mats
Vacuum thoroughly before brushing.
Use a soft or medium hand brush on delicate textiles and firmer synthetic bristles on confirmed durable carpet or rubber mats. Drill attachments and stiff hand brushes are sold for heavier stains, but retail categories do not establish safe limits for every seat cloth, headliner, carpet pile, or upholstery construction.
Headliners and unsupported fabrics deserve particular caution. When material tolerance is uncertain, use a hand tool, limited moisture, and a test area rather than powered agitation.
Badges, grilles, seams, fuel doors, and jambs
Remove loose contamination first. Pre-rinse exterior areas or pre-spray where appropriate, apply a surface-compatible cleaner, and use a small brush with lubrication. Agitate gently, then rinse or wipe away loosened residue promptly. This sequence aligns with commercial step-by-step guidance for exterior crevices and residue removal. Jennychem’s use guide describes pre-rinsing or pre-spraying, light agitation, section-by-section rinsing, and full drying.
Watch the complete brush, not only its bristles. Around fuel doors and jambs, control liquid near locks, connectors, seals, and cabin openings.
Paint and coated exterior surfaces
Brushes should have a limited, precise role on paint—typically around badges, seams, trim edges, or intricate areas where a wash mitt cannot fit. Remove loose contamination first and maintain lubrication. Do not aggressively dry-scrub paint merely because a brush is advertised as soft.
A coating does not establish that the underlying finish is immune to poor technique. Use light agitation, begin with a small test section, and stop if the process requires substantial pressure.
Wheels: divide the wheel into separate tasks
A “wheel brush” is not one universal design. Consider at least four zones:
- Wheel faces: Use a soft face brush selected for the finish, especially on gloss-black or unfamiliar coatings.
- Barrels: Use a long, narrow brush that fits behind the spokes and around brake components without being forced.
- Lug holes: Use a separate wheel-dedicated mini brush that reaches the recess while keeping hard construction away from the finish.
- Tight spokes and intricate recesses: Use a narrow flexible tool that can enter and withdraw without striking adjacent surfaces.
Pre-rinse when appropriate, use a cleaner approved for the wheel finish, and remove residue according to the product instructions. A brush that fits one wheel may not fit another because caliper, rotor, spoke, and barrel clearances differ.
Tires and fender wells
Use dedicated, robust brushes sized to the work. A compact tire brush can fit slim sidewalls and tight arches; a larger head may be more efficient on oversized or off-road tires. Look for enough flex to follow the sidewall texture while still providing useful agitation.
Fender-well brushes generally need more reach and a broader head. Inspect liners and nearby painted areas before using a firm brush.
Tire and fender-well tools should never migrate to paint or interiors. They operate in heavily contaminated zones and may retain abrasive dirt or cleaner residue even when the surface of the bristles appears clean.
Engine bays
Engine bays combine durable covers and hoses with connectors, sensors, labels, plated hardware, painted parts, and aging plastics. Sellers commonly recommend stiffer, chemical-tolerant synthetic brushes for greasy durable components, but that recommendation does not apply automatically to the entire compartment.
Follow the vehicle and chemical instructions, protect sensitive electrical areas, and control liquid rather than flooding the bay. Use smaller brushes around crowded components and a separate utility brush for robust areas. Do not infer that one cleaner is compatible with every material under the hood.
When is a specialty brush justified?
A specialty tool is worth adding when:
- Your existing brush cannot reach without striking an adjacent surface.
- The area carries contamination that should be isolated.
- A broader or contoured head materially improves contact.
- The surface requires a distinctly softer brush.
- You repeatedly clean leather, pet hair, wheel barrels, fender wells, or engine bays.
- A powered tool would save meaningful time on a confirmed durable material.
A clean general-purpose brush may be sufficient when:
- It fits the space without forced contact.
- Its stiffness suits the finish and contamination.
- It remains within one compatible contamination zone.
- Its construction has no exposed or rough edges.
- The cleaner is compatible and the test spot shows no adverse effect.
Scratch Risk Depends on More Than Bristle Softness
No supplied source independently proves a detail brush to be scratch-free on every automotive surface. Much of the language around softness, chemical resistance, durability, and surface safety comes from sellers or manufacturers rather than controlled comparative testing.
A soft brush can still mark a surface when:
- Grit is embedded between the bristles.
- Residue remains from wheels, tires, an engine bay, or a previous cleaner.
- A surface that needs lubrication is brushed dry.
- Excessive pressure bends the bristles until the collar or handle contacts the panel.
- The cleaner is incompatible with the finish.
- Bristles are damaged, hardened, or permanently distorted.
- Metal, wire, or a rough ferrule becomes exposed.
- The finish is unusually sensitive, degraded, repainted, or already compromised.
Before touching a delicate area, spread the bristles and inspect deep into the head. Check for grit, loose clumps, cracked collars, rough ferrules, exposed wire, hardened residue, and bristles that feel sharp or sticky.
For coated paint or exterior trim, remove loose contamination first. Keep the working area lubricated and use gentle agitation rather than trying to force the brush through bonded grime. Commercial coating guidance likewise recommends pre-cleaning, lubrication, clean tools, and separation between paint and high-contamination zones. Titan Coatings’ guide describes these precautions for coated surfaces and dedicated brushes.
Gloss-black wheels, piano-black cabin trim, screens, gauge lenses, and unfamiliar finishes always merit a test spot. If uncertainty remains, switch to a softer tool or the vehicle manufacturer’s recommended cloth-based method.
Separate tools by contamination zone
Wheels, tires, fender wells, and engine bays carry contamination and chemical residue that should not reach paint or interiors. Dedicated tools reduce that transfer risk, provided the brushes themselves are cleaned correctly.
Color coding is a simple organizational method, not an industry standard. For example:
- Blue: interiors
- Green: paint and exterior trim
- Red: wheels
- Black: tires and fender wells
- Orange: engine bay
Labels or separate containers work equally well. The goal is to make accidental crossover difficult.
Stop work immediately if a brush exposes metal, retains sharp debris, develops a loose head, sheds in clumps, or creates visible marking in the test area. Do not continue using a structurally damaged brush merely because its remaining bristles still feel soft.
Size, Shape, Handle, and Construction Matter
Bristle material receives most of the attention, but geometry determines whether a brush can do the job without awkward or unintended contact.
Evaluate:
- Head diameter and shape
- Bristle length and density
- Overall tool length
- Handle thickness and geometry
- Clearance around nearby components
- Collar, ferrule, and tip construction
- Grip when wet or while wearing gloves
- Storage and drying provisions
Match the head to the space
Mini or small round brushes suit vents, switches, seams, emblems, door handles, lug holes, and narrow engine-compartment openings. A smaller head improves access and may reduce unintended contact with adjacent surfaces, although it takes longer on broad areas.
Do not use the same mini brush for clean exterior crevices and wheel lug holes. These locations need similar geometry but belong to different contamination zones.
Larger rounded or rectangular heads suit tires, carpets, cargo areas, convertible tops, and fender wells.
Long, narrow, cylindrical, or spiral-style tools are designed for wheel barrels and spaces between spokes. Length alone is insufficient. Inspect the path around the brake rotor and caliper, then consider whether the brush can bend, compress, and withdraw without scraping nearby surfaces.
Match tire-brush size to the sidewall. A compact head offers better access on low-profile tires, while a larger brush may cover oversized or off-road sidewalls more efficiently.
Long handle or short handle?
Long handles improve reach into wheel barrels, fender wells, lower grilles, and engine compartments.
Short handles provide close control around cabin controls, badges, seams, and leather. They may become awkward where additional reach is necessary.
Rubberized grips and full-hand handles are documented seller features, not proof that a brush will be more comfortable for every user. Consider hand size, gloves, working angle, and whether the handle remains controllable when wet.
As a specification example, VIKING lists a two-brush interior set with an 8-inch brush and 1-inch diameter plus a 9-inch brush and 1.5-inch diameter. These dimensions illustrate how two head sizes can divide tight crevices from broader dashboard or console work; they do not establish superior performance. See VIKING’s listed dimensions and intended interior areas.
Construction and exposed hardware
Near sensitive surfaces, look for metal-free construction or a protected tip. Inspect collars and ferrules for molding seams, cracks, looseness, or rough edges. Remember that bristles compress in use, bringing the collar closer to the surface.
Detailing-forum participants have reported plastic collars cracking, particularly on brushes used outside and repeatedly exposed to water. Some suggested that one-piece construction might remove one potential failure point, while others disputed whether it would prevent failures originating elsewhere. These reports are anecdotal and do not prove that one-piece brushes last longer. A Detailing World discussion records both collar failures and conflicting opinions about one-piece construction.
Treat construction as an inspection issue rather than a marketing shortcut. Either design should be retired when structural damage makes the tool unpredictable or exposes a hard edge.
Hand Brushes vs. Drill Brushes
Manual and powered brushes solve different problems. Compare them by control, speed, fatigue, reach, and potential damage rather than assuming power is an upgrade.
| Factor | Hand brush | Drill brush |
|---|---|---|
| Control | Direct control of pressure, direction, and stroke length | Rotation can amplify small errors |
| Speed | Slower on large areas | Faster on suitable broad, durable materials |
| Fatigue | More repetitive hand effort | May reduce scrubbing effort but adds tool weight |
| Reach | Available in many small shapes | Limited by drill body, attachment shape, and clearance |
| Sensitive surfaces | More conservative choice | Generally unsuitable when material tolerance is uncertain |
| Consistency | Pressure can be adjusted immediately by feel | Repeated rotation can concentrate agitation |
| Supporting process | Works with wiping, rinsing, or extraction | Still requires compatible chemistry and residue removal |
They suit vents, switches, leather, delicate trim, badges, and tight exterior details.
Drill-brush sets are marketed in lighter, medium, and heavier grades for carpets, mats, upholstery, seats, and stains. These categories describe intended use; they do not establish universal safety for every fabric, headliner, leather coating, plastic, or seat construction. Detail Geek lists soft and medium drill-brush sets for different levels of interior staining.
If powered agitation is appropriate:
- Vacuum and inspect the material.
- Select the least aggressive grade likely to work.
- Secure the attachment according to its instructions.
- Test an inconspicuous area.
- Begin at low speed with light pressure.
- Keep the brush moving rather than dwelling on one spot.
- Stop if fibers fuzz, distort, pull, or discolor.
- Avoid delicate trim, unsupported fabric, seams, piping, loose edges, and unknown materials.
A drill brush does not replace suitable chemistry, dwell time, extraction, wiping, or rinsing. Its role is agitation. More speed cannot compensate for an incompatible cleaner or a process that leaves soil and chemical residue behind.
Decision rule: Use a hand brush whenever surface sensitivity or compatibility is uncertain. Consider a drill brush only when the material is confirmed durable and controlled powered agitation offers a practical efficiency advantage.
Build a Starter Kit Without Buying Brushes You Will Not Use
A useful starter kit does not need dozens of brushes. Begin with five functions:
- One ultra-soft interior brush for vents, controls, and delicate plastics.
- One clean-zone mini crevice brush for either interior seams or exterior badges and trim—assign it to one zone and keep it there.
- One dedicated wheel-face brush selected for the wheel finish.
- One long wheel-barrel brush that fits the vehicle’s spoke and brake clearances.
- One dedicated tire brush sized for the sidewall.
This setup covers common work while preserving separation between the cleanest and dirtiest zones. The mini brush must not migrate to lug holes. If the wheels require a small lug or spoke brush, add a second mini brush dedicated exclusively to wheels.
If you do not clean wheel barrels, substitute that tool only after confirming another recurring task is more relevant to your vehicle.
Enthusiast expansion
Add tools when repeated use justifies them:
- A gentle leather brush
- A carpet or upholstery brush
- A wheel-only mini brush for lug holes and tight spokes
- A fender-well brush
- A dedicated engine-bay brush
- A separate exterior trim or jamb brush
These additions improve contamination control and geometry more than buying extra copies of one undifferentiated round brush.
Professional or multi-vehicle expansion
A working detailer may need:
- Multiple head sizes within each work zone
- Duplicates to keep work moving while brushes dry
- Color-coded sets for staff consistency
- Tools selected for known chemical exposure
- Dedicated pet-hair tools
- Powered brushes for confirmed durable materials
- Vehicle-specific barrel brushes and tire-brush sizes
- Separate mini tools for interiors, paint-adjacent crevices, wheels, and engine bays
The reason to own more brushes is workflow and task coverage—not the appearance of a large collection.
Compare coverage, not brush count
| Buying option | Interiors | Clean-zone crevices | Leather | Wheel faces | Wheel barrels | Wheel-only recesses | Tires | Carpets | Pet hair | Engine bay |
|---|---|---|---|---|---|---|---|---|---|---|
| Five-function starter setup | Yes | Yes | Limited | Yes | Yes | No | Yes | Limited | No | Limited |
| Starter setup plus wheel mini | Yes | Yes | Limited | Yes | Yes | Yes | Yes | Limited | No | Limited |
| General-purpose multipack | Usually | Usually | Uncertain | Sometimes | Rarely | Sometimes | Rarely | Sometimes | No | Sometimes |
| Interior-focused kit | Yes | Yes | Sometimes | No | No | No | No | Sometimes | Sometimes | No |
| Wheel-and-tire kit | No | No | No | Yes | Check contents | Check contents | Yes | No | No | No |
| Enthusiast task-built kit | Yes | Yes | Yes | Yes | Yes | Yes | Yes | Yes | Optional | Yes |
| Broad premium bundle | Usually | Usually | Check contents | Check contents | Check contents | Check contents | Often | Often | Sometimes | Sometimes |
“Limited” means a brush might physically perform the task but is not necessarily the ideal dedicated tool. “Check contents” matters because names such as “complete” or “ultimate” do not guarantee a barrel brush, wheel-only mini, leather brush, or pet-hair tool.
Bundles can simplify setup when every included brush maps to a real task. They can also contain redundant general-purpose brushes while omitting the specialty tool a buyer expects. Blackline’s listed tiers, for example, add a tire brush at one level and leather and pet-hair tools only at a higher level; the bundle name alone does not establish wheel-barrel coverage. The listed Blackline tier contents show why each tool should be checked individually.
Buying individually allows barrel clearance, tire sizing, wheel finish, and interior sensitivity to drive the choice. A bundle can still be convenient when its listed contents match the actual vehicle and its color or size variety supports work-zone separation.
Price context
The following figures are historical listing examples from the supplied evidence reviewed on August 22, 2026, not current recommendations:
- Relevant automotive detail-brush listings in the captured Amazon category ranged from $4.99 to $15.99. Amazon describes bestseller positions as sales-based rankings that update frequently.
- Detail Factory’s captured collection listed specialty products and sets from $6.95 to $32.95. See the captured Detail Factory category prices.
- Detail Geek listed individual brush products from $13 to $28, with a broad bundle at $118. See the captured Detail Geek collection.
- Blackline displayed its selected Basic tier at $44.20. See the captured Blackline kit listing.
Prices, discounts, stock, shipping terms, ratings, and marketplace rankings can change. Verify them before buying. Customer ratings and bestseller positions are marketplace signals, not controlled evidence of scratch safety, cleaning performance, or durability.
Do not compare only the initial total. Check whether the purchase covers the actual work zones, whether dimensions fit, and whether omitted specialty tools will need to be purchased immediately afterward.
Use, Clean, Store, and Replace Brushes Safely
A repeatable process matters as much as bristle material.
A safer use workflow
- Inspect the surface. Identify its material, finish, existing damage, and contamination.
- Inspect the brush. Look for embedded grit, dried product, damaged bristles, cracks, looseness, and exposed hard parts.
- Remove loose contamination. Vacuum interiors and pre-rinse exterior areas where appropriate.
- Choose compatible chemistry. Follow cleaner dilution, dwell time, material warnings, and vehicle-manufacturer instructions.
- Pre-spray or pre-rinse as appropriate. Do not assume every surface should be saturated.
- Test a small inconspicuous area. Check the cleaning effect and any visible change.
- Agitate lightly. Let compatible chemistry and dwell time do part of the work.
- Remove loosened residue promptly. Wipe, extract, or rinse as the surface and product require.
- Inspect after drying. Look for residue, streaking, texture change, or marking before continuing.
Avoid generic assumptions about strong degreasers, acids, or solvents. Compatibility depends on concentration, dwell time, brush construction, and every material the product may contact.
Rinse the brush between dirty sections so it does not keep moving loosened grit across the next area. For heavily contaminated work, clean the bristles under running water or in a designated rinse setup before proceeding.
Cleaning after use
After the job:
- Rinse the bristles thoroughly.
- Apply mild soap when water alone does not remove residue.
- Work embedded debris out gently with your fingers or a suitable brush-cleaning tool.
- Rinse until the bristles and base stop releasing visible contamination or foam.
- Shake out excess water.
- Reshape distorted bristles without pulling them.
- Allow the brush to air-dry completely.
- Store it only when dry.
Seller guidance consistently recommends rinsing, removing embedded contamination, air-drying, and keeping tools separated by task. Hanging holes or upside-down drying are reasonable options when they allow airflow without deforming the bristles; complete drying matters more than one mandatory orientation. The Rag Company’s promotional brush overview demonstrates rinsing and hanging brushes to air-dry.
Store brushes in labeled containers, divided drawers, wall hooks, or color-coded groups so interior, paint, wheel, tire, and engine tools cannot be confused. Do not seal damp brushes in a closed bag.
Pre-use and replacement checklist
Before each use, ask:
- Is grit trapped deep in the bristle base?
- Does chemical residue remain?
- Are bristles permanently splayed, hardened, sticky, or distorted?
- Is shedding increasing or occurring in clumps?
- Is the head loose?
- Is the collar cracked?
- Is metal, wire, or a rough edge exposed?
- Has the handle split or become difficult to control?
- Can the tool still be confidently assigned to its intended work zone?
Replace the brush if cleaning cannot remove sharp contamination, structural damage exposes a hard edge, or the tool can no longer be controlled predictably. The supplied evidence provides no validated service life or replacement interval; condition and contamination are more useful than age alone.
A retailer-produced promotional video states that some early shedding may occur with natural boar hair, but it provides no tested threshold for normal break-in. Continued heavy shedding, clumps coming loose, or visible head failure should therefore be treated as reasons to stop and inspect the tool rather than assumptions that shedding is harmless.
Frequently Asked Questions
Are boar-hair or synthetic detail brushes better?
Neither is inherently better. Boar hair varies considerably in stiffness and is marketed for tasks ranging from interiors and leather to jambs and wheel details. Synthetic brushes range from ultra-soft flagged filaments to stiff tire and carpet tools.
Choose by actual stiffness, tip design, density, construction, intended chemical exposure, and surface—not merely the natural-versus-synthetic label. For a sensitive surface, test a clean soft brush with minimal pressure. For dirty durable areas, a more robust synthetic may be easier to maintain, but cleaner compatibility still requires confirmation.
Can I use the same detail brush on wheels and the car interior?
It is better not to. Wheel brushes can retain brake dust, road grit, wheel cleaner, and greasy residue. Moving the same tool into the cabin creates unnecessary contamination and marking risk.
Keep wheel, tire, engine, paint, and interior brushes separate. This applies to mini brushes as well: an interior or paint-adjacent crevice brush should not double as a lug-hole brush.
What type of brush should I use on piano-black trim or an infotainment screen?
Use the most conservative approved process: a clean ultra-soft brush, minimal pressure, and an inconspicuous test. Dry dusting may suit loose dust; adhered fingerprints or grime may be better handled with the vehicle manufacturer’s recommended cloth and cleaner.
Do not assume any brush is universally scratch-free. If the vehicle manual advises against brushing or applying liquid to the screen, follow that instruction.
Are drill brushes safe for car seats, carpets, and upholstery?
Only conditionally. They may be useful on confirmed durable carpets, mats, or certain upholstery, but the supplied retail guidance does not establish safety for every seat fabric, headliner, leather coating, or textile.
Test a hidden area, use the least aggressive suitable grade, begin at low speed with light pressure, and avoid seams, unsupported fabric, delicate trim, and loose edges. When compatibility is uncertain, use a hand brush.
How many detailing brushes does a beginner need?
Five functions make a practical starting point: an ultra-soft interior brush, a clean-zone mini crevice brush, a wheel-face brush, a wheel-barrel brush that fits the vehicle, and a dedicated tire brush.
That starter mini must remain in one clean zone. Add a separate wheel-only mini brush if you need to clean lug holes or intricate spokes. You may need more tools for leather, delicate upholstery, large fender wells, frequent pet hair, or engine-bay work.
The Bottom Line
Identify the surfaces, contamination, and clearances on the actual vehicle. Then choose the least aggressive brush that can perform each job, and add specialty tools only when they solve a specific reach, material, workflow, or contamination problem.
A modest set of clean, dedicated brushes is more useful than a large undifferentiated bundle. Safe results depend not only on whether the label says synthetic, boar hair, or horsehair, but also on inspection, lubrication, pressure, chemical compatibility, test spots, work-zone separation, cleaning, and dry storage.