
Choose a Leather-Cleaning Cloth Without Falling for Towel Hype
Soft microfiber generally suits finished automotive leather; learn what to buy, when to avoid it, and how to spot-test, clean, dry, and condition.
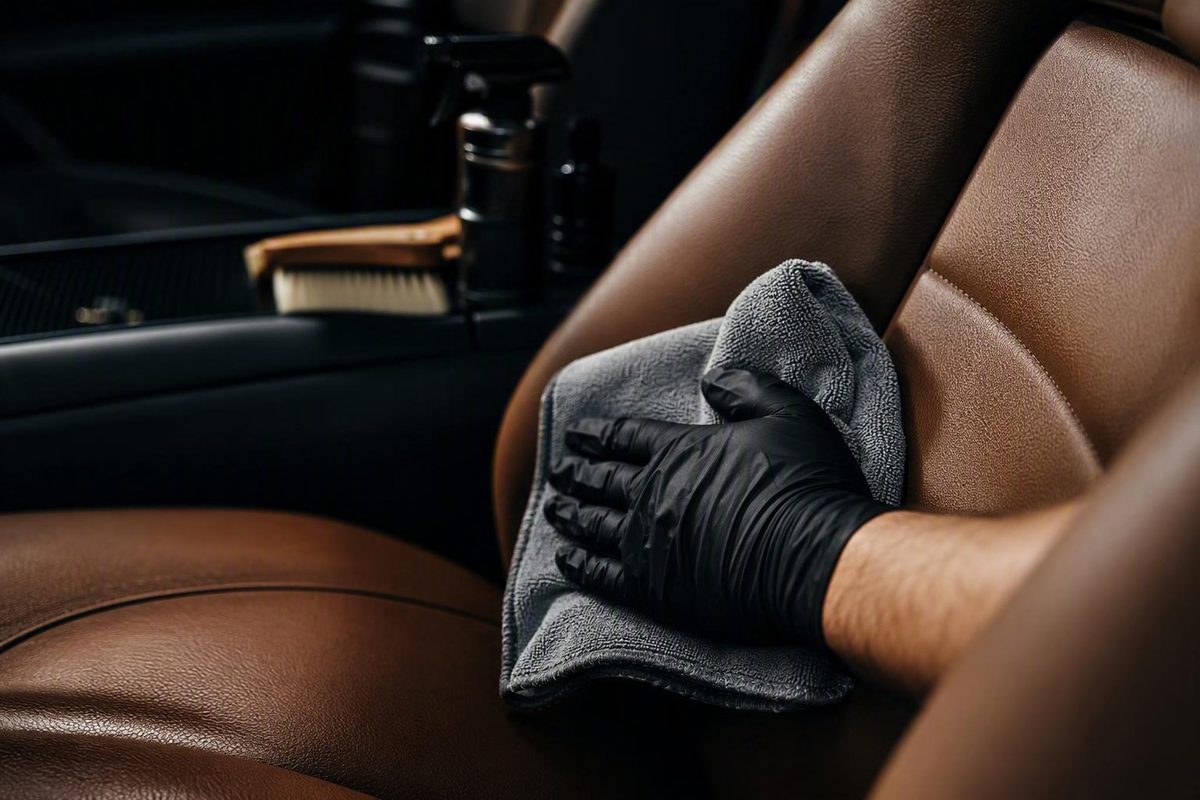
Do not pay extra solely for a particular GSM, weave, blend, pile, size, brand, or “edgeless” label: the cited product listings provide specifications, but not independent comparative testing that establishes one ideal design.
Before cleaning, confirm the upholstery type in the owner’s manual, spot-test the cleaner and cloth, vacuum loose debris, control moisture, and assign separate cloths to cleaning, residue removal, drying, and conditioning.
The short answer: use clean, soft microfiber on finished automotive leather
A clean, soft microfiber cloth is generally suitable for wiping, drying, and treating finished automotive leather. Toyota recommends microfiber or another soft cloth for vehicle interiors, notes that most leather cleaners are intended for use with one of these cloths, and advises using a separate cloth for conditioner. It also tells owners to follow the cleaner manufacturer’s directions (Toyota’s interior-cleaning guidance).
That is not a universal endorsement for everything sold as leather. Do not automatically extend this method to suede, nubuck, aniline or unfinished leather. Peeling, cracked, redyed, antique, repaired, or otherwise damaged upholstery may also require finish-specific care. The vehicle owner’s manual and leather-care product instructions take priority over a general method.
Microfiber does not guarantee scratch-free cleaning.
| Upholstery condition | Is microfiber suitable? | Main precaution |
|---|---|---|
| Finished or coated automotive leather | Generally, after a spot test | Use a compatible cleaner, light pressure, and clean cloth faces |
| Perforated or heated leather | Usually, with strict moisture control | Apply product to the tool; do not soak holes or seams (automotive leather-care guidance) |
| Pale or redyed leather | Possibly, after testing the cloth and cleaner | Use white or verified-colorfast cloth; watch for color transfer (redyed-leather precautions) |
| Unknown, unfinished, aniline, suede, nubuck, peeling, cracked, or damaged leather | Do not assume so | Obtain instructions for that finish and condition before proceeding |
Treat towel cleanliness as a process requirement, not an optional extra. Vacuuming comes first because loose particles trapped beneath a cloth can act abrasively. Even a very soft towel cannot compensate for grit dragged across a seat.
What to look for when buying a leather-cleaning cloth
A useful microfiber cloth for cleaning leather does not need an elaborate specification sheet. Use this practical buying checklist:
-
Soft, clean working surface: Reject anything stiff, crusted, gritty, or visibly contaminated.
-
Manageable size: Choose a cloth you can fold into several controlled working faces without it bunching in your hand.
-
White or reliably colorfast fabric: White can make dirt and possible leather-color transfer easier to see. Colored towels can work, but verify that their dye does not transfer, particularly on pale upholstery.
-
Enough cloths to separate tasks: A small set is usually more useful than one premium towel expected to perform every stage.
No cited independent testing establishes an ideal GSM, pile height, weave, fiber blend, edge style, or towel dimension for automotive leather. A dense towel is not automatically safer, and a thin towel is not automatically too aggressive. Likewise, an 80/20 blend or edgeless construction is a specification—not proof of superior cleaning.
Treat labels such as leather-safe, scratch-free, lint-free, and non-abrasive as seller claims unless they are supported by relevant independent testing. Marketplace prices, ratings, review counts, stock badges, and sales labels are also poor measures of leather safety.
The following is a non-ranked snapshot of disclosed product information from September 2026:
| Example | Disclosed listing facts | What is not established |
|---|---|---|
| Leather CPR two-pack | Microfiber; two cloths; listed at 16 × 5 inches (listing) | Blend, GSM, weave, borders, wash method, comparative performance |
| Cobbler’s Choice cloth | 12 × 12 inches; instructions say to wash hot, avoid bleach and fabric softener, and tumble dry low (product page) | Blend, GSM, weave, finish compatibility, independent safety |
| Auto Leather Dye towel | 12 × 12 inches; seller-listed 80/20 polyester-polyamide blend, 300 GSM, white fabric, and overlock edges (product page) | Whether those specifications improve leather safety or cleaning |
| The Rag Company collection | Edgeless 245, Edgeless 300, and Edgeless 365 categorized for leather cleaning (collection page) | Comparative evidence that one model—or edgeless construction—is safer |
These listings are useful for comparing disclosed construction and care information. None independently proves superior cleaning performance or compatibility with every automotive leather finish. Confirm current dimensions and instructions on the product page before buying if those details matter to you.
Use more than one cloth: a task-by-task setup
| Cloth label | Role | Keep it free from |
|---|---|---|
| 1 — Cleaner | Apply compatible cleaner and wipe gently | Conditioner, polish, wheel grime |
| 2 — Residue | Lift cleaner and suspended soil | Fresh cleaner and conditioner |
| 3 — Dry | Remove remaining moisture and inspect the finish | All detailing products |
| 4 — Condition/Buff | Apply or buff approved conditioner when appropriate | Grit, cleaner, drying moisture |
Color-coding makes the system easy to follow: one color for cleaner, another for residue, and white for final drying, for example. Before using a colored towel on pale leather, confirm that it is reliably colorfast. If you prefer all-white cloths, label their storage bags or compartments instead.
Do not return a conditioner cloth to cleaning or drying duty merely because it looks clean. Launder it thoroughly and inspect it for oily, waxy, or silicone-like residue. If it remains loaded, stiff, or slick, retire it from leather work.
Conditioning is not automatically required after every cleaning. Whether it is appropriate depends on the leather, its coating and condition, and the product involved. Follow the vehicle and care-product manufacturers rather than adopting a universal conditioning schedule.
How to clean leather seats with microfiber
-
Identify the upholstery and read the directions. Check the owner’s manual for the seat material, exclusions, and model-specific instructions. Read the cleaner label for compatible finishes, application method, dwell time, and residue-removal directions.
-
Inspect before adding moisture. Look for peeling, cracking, redyed areas, repairs, open seams, perforations, loose coatings, or unusual wear. Any of these conditions may require a different process or professional assessment.
-
Vacuum loose particles. Use a soft attachment and check the nozzle for sharp or rough edges. Work along seams and creases without scraping them. Removing loose debris helps prevent grit from becoming abrasive beneath the cloth.
-
Spot-test the cloth and cleaner. Test both in a hidden area. Allow the test to develop according to the product directions, then inspect the seat and towel. Stop if color transfers, the finish darkens unexpectedly, or the surface becomes tacky. Commercial automotive guidance likewise recommends inspecting the vacuum tip, testing cleaner in a concealed area, working in small sections, and avoiding aggressive scrubbing (Crash Champions’ leather-seat guide).
-
Apply cleaner sparingly. Put a small amount on the microfiber cloth or another approved tool rather than saturating the seat. Fold the towel into several faces and clean one small section gently. Do not bear down or repeatedly grind the same spot.
-
Match the tool to the dirt. If gentle wiping does not release embedded soil, use a leather-approved soft brush rather than increasing towel pressure. A brush is not automatically better; it is a different agitation tool for dirt the cloth cannot lift gently.
-
Remove cleaner and soil. Use the separate residue cloth. Turn to a fresh face as soon as the current one becomes dirty. Do not let spent cleaner dry on the surface.
-
Dry the section completely. Use a third clean cloth, paying attention to seams, creases, and perforations. Apply conditioner only if the manufacturer approves it for that upholstery and only after the surface is dry.
For one driver’s-seat bolster, the sequence is straightforward: vacuum the bolster and seam, test the cleaner low on the seat, place a small amount on the application cloth, wipe one hand-sized area gently, lift the loosened residue with cloth two, inspect the color and feel, and dry with cloth three. Repeat only if the first pass produced no adverse change.
Adjust the method for perforated, heated, pale, or redyed leather
Perforated leather: Put cleaner sparingly on the cloth or approved brush rather than spraying the seat directly. Use controlled wiping or blotting around holes and seams. The goal is to clean the surface without driving liquid into the perforations or underlying upholstery.
Heated seats: Use the same strict moisture control around perforations, seams, and panel junctions. Do not soak the seat. Follow any model-specific restriction in the owner’s manual.
Pale leather: Prefer a white or verified-colorfast cloth. Stop if towel dye appears on the upholstery or the seat’s color appears on the towel.
Redyed leather: Repair dyes and coatings can react differently from the original factory finish. Test the cleaner and conditioner separately in a hidden area before expanding the work. Do not assume a repaired panel will tolerate the same process as the surrounding upholstery.
Uncertain or damaged leather: Do not extend this coated automotive-leather method to peeling, cracked, unfinished, aniline, suede, nubuck, antique, or unidentified leather. Obtain instructions appropriate to that exact finish and condition.
Stop and reassess
Pause if you notice unexpected color transfer, persistent darkening, tackiness, streaks, residue that will not lift, or cleaner drying on the surface. Do not add more product or pressure to force a result. Remove only what the product directions say can be removed, let the test area stabilize, and consult the vehicle manufacturer, cleaner manufacturer, or a leather-repair specialist before continuing.
Wash, store, and retire leather-care microfiber separately
Follow each towel manufacturer’s care label instead of adopting one wash temperature for every microfiber product. As a product-specific example, Cobbler’s Choice instructs users to wash its cloth hot, avoid bleach and fabric softener, and tumble dry on low. Those settings apply to that cloth; they are not a universal microfiber formula.
Where a care label prohibits fabric softener, follow that restriction.
Let washed cloths dry fully, then store them in a closed, labeled container away from dust and used detailing towels. Separate bags or compartments for “cleaner,” “residue,” “dry,” and “conditioner” cloths make accidental mixing less likely.
Retire a towel from leather duty if it remains gritty, stiff, heavily stained, or prone to shedding—or if wax, polish, silicone, grease, or dye remains after washing. It may still have a lower-risk utility role, but it no longer belongs on a sensitive seat finish.
Frequently asked questions
Does a microfiber cloth need to be marketed specifically for leather?
No. A leather-specific label indicates the seller’s intended use, but it does not prove that the cloth outperforms an equivalent clean, soft general-purpose microfiber towel. Cleanliness, softness, shedding, colorfastness, border construction, laundering information, and compatibility with the actual leather finish matter more than category wording.
Use a general-purpose cloth only if it is soft, low-shedding, uncontaminated, and white or reliably colorfast. Spot-test it with the cleaner before treating a visible area.
Is an edgeless microfiber towel proven safer for leather?
No cited independent comparative testing establishes that an edgeless towel is safer than a well-made towel with smooth borders. Retailer classification of a towel as suitable for leather cleaning is not an abrasion test.
An edgeless design removes one border from consideration, but the towel can still carry grit, hardened residue, or excess product. Inspect the entire cloth and use clean faces with light pressure rather than treating edge style as a safety guarantee.
The practical purchase is several soft, easily labeled microfiber cloths—not one towel carrying unsupported premium claims. Verify the leather, vacuum first, spot-test, use little cleaner and pressure, control moisture around perforations, and keep each cloth assigned to one stage. If the finish is unknown or damaged, stop and obtain finish-specific instructions.