
A Shop-Approved Cleaning Plan for Your Newly Repaired Car
A gentle hand-wash approval does not cover a pressure washer, automatic wash, polish, wax, sealant, ceramic coating or paint protection film.
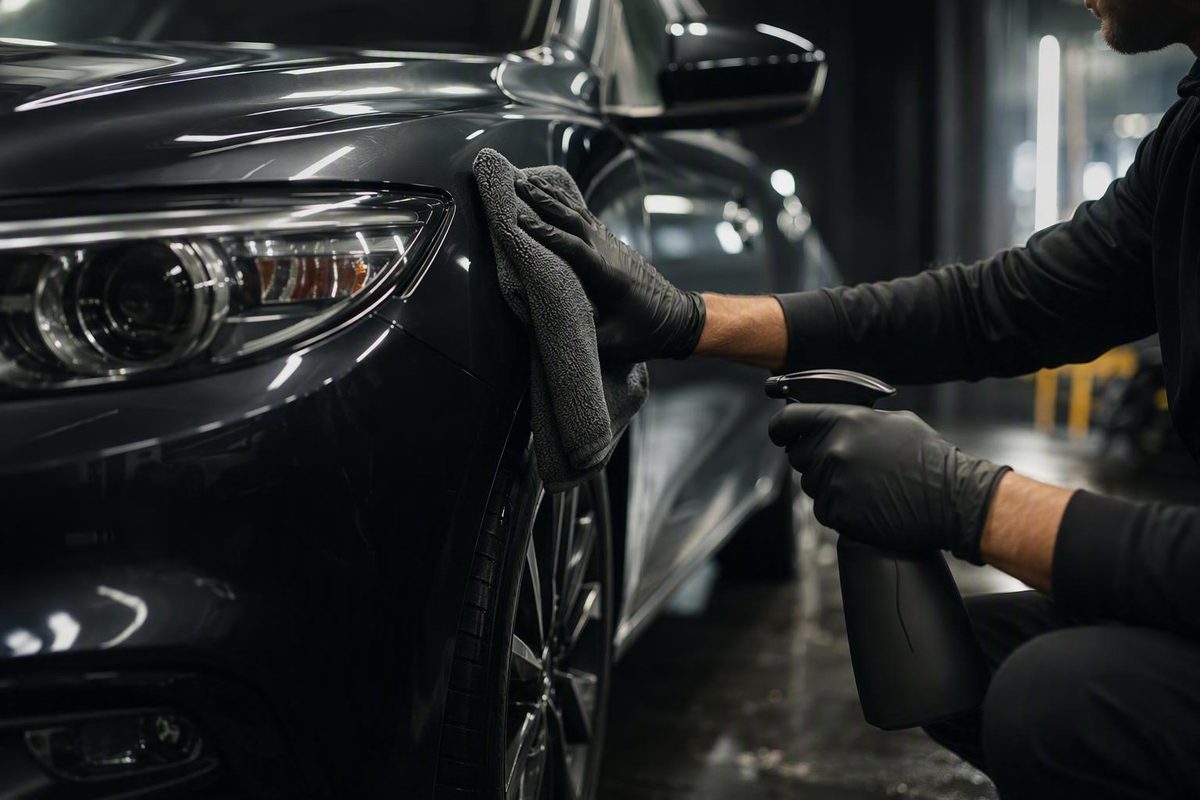
The safest way to clean a car after body repair is not to follow a single countdown found online. First identify exactly what the shop repaired, then follow its written aftercare instructions for the refinishing system and any installed components.
Fresh paint can feel dry while curing continues. Permission to perform a gentle hand wash does not automatically mean the vehicle is ready for a pressure washer, automatic wash, polish, wax, sealant, ceramic coating, or paint protection film. Treat each as a separate milestone.
If you did not receive written instructions, contact the repairing shop before cleaning the affected area. The shop knows which materials and processes were used and is best placed to approve a method and date. The available published guidance comes from commercial repair and car-care businesses rather than a manufacturer-backed technical standard, so generic dates should remain secondary to repair-specific instructions.
Before Cleaning Anything, Find Out What the Repair Included
Not every body repair requires the same cleaning precautions. Restrictions associated with curing paint primarily concern work involving fresh color coat, clear coat, or refinishing blended into adjacent panels. Mechanical work or an unpainted replacement part may have different limitations, although installed trim, seals, decals, bonded parts, or other components may still require care.
Review the invoice and ask whether the work included any of the following:
- Fresh color coat or clear coat
- Paint blended into an adjacent panel
- Repaired or newly painted panel edges
- Painted bumpers, mirror caps, handles, or trim
- Adhesive-mounted moldings, badges, or emblems
- Decals, stripes, wraps, or protective film
- Replacement cameras, parking sensors, lamps, or trim
- New weather seals or bonded glass
- Body or mechanical work completed without refinishing
Do not assume a panel was untouched because it was not visibly damaged.
At pickup, request four separate pieces of information:
- The name of the refinishing system used
- The approved date and method for the first gentle hand wash
- The approved date for automatic, touchless, self-service, or pressure washing
- Separate approved dates for decontamination, polishing, wax, sealant, ceramic coating, and paint protection film
Ask for the details in writing if possible. An invoice note, aftercare sheet, email, or text is more useful than trying to remember a verbal estimate.
Do not use touch, smoothness, or gloss as a cure test. Automotive paint may feel dry before curing is complete, and timing can vary with the refinishing system and repair conditions, as explained in Eustis Body Shop’s fresh-paint guidance. A shiny, even-looking surface is reassuring, but it does not establish that a particular washing or protection process is approved.
Use this compact decision path:
- No fresh paint or clear coat: Ask whether any installed or bonded components have washing restrictions.
- Fresh paint or clear coat: Follow the shop’s written dates and approved methods.
- Repair details are uncertain: Treat the area cautiously and contact the shop before washing.
- Urgent contamination is present: Request a spot-cleaning procedure rather than turning a localized problem into an unapproved full wash.
The controlling rule is simple: the repairing shop’s specific written instructions override a generic online timeline.
Use a Conditional Timeline, Not a Universal Waiting Period
The available evidence does not establish one universal first-wash date. Commercial repair businesses publish recommendations ranging from approximately one week to at least a month, with different dates for hand washing, automatic washing, and paint protection. These recommendations are not manufacturer specifications or an independent technical consensus.
The disagreement is clearer when each business’s advice is kept intact:
| Published source | First gentle hand wash | Automatic or high-pressure wash | Wax, sealant, or broader protection |
|---|---|---|---|
| Becker Body Shop | Approximately 7–14 days | Avoid for at least 30 days | Wait approximately 60–90 days |
| Dynasty Auto Body | At least 14 days | Avoid for at least 30 days | Wait approximately 60–90 days |
| Eustis Body Shop | At least 30 days under its guidance | Avoid automatic brush washing; follow shop instructions | Delay wax at least 30 days, or longer if instructed |
| Dimmitt Collision | At least 30 days for a normal wash under its guidance | Favors hand washing over automatic equipment | No universal date established in the supplied guidance |
| Auto Clinique | No washing for 14 days, followed by gentle hand washing | Avoid automatic and high-pressure washing for at least six weeks | Describes a broad 30–90-day curing or protection period and advises shop approval |
| Affordable Tires & Auto Repair | Wait at least 30 days after paint repair under its guidance | Treats touchless as an option only after the applicable restriction | Avoid protection during its stated initial curing period |
These figures are examples of source-specific advice, not dates to average together. Do not choose the shortest figure because it is convenient, and do not assume that reaching the longest published date automatically approves every process. The correct timing depends on the refinishing system, repair process, conditions, and instructions supplied by the shop.
Separate four different milestones:
- Urgent spot cleaning: Localized treatment of a deposit that should not be aggressively left or spread.
- First gentle hand wash: Mild automotive shampoo, clean soft tools, and the low-pressure water method approved by the shop.
- Automated or high-pressure washing: Equipment that can introduce different detergents, contact, or concentrated water force.
- Polishing or paint protection: Processes involving abrasion, additional mechanical contact, or products left on the finish.
Approval for one milestone is not approval for the others. In particular, broad references to a 30–90-day period should not be interpreted as proof that every paint system is fully cured on a specific day.
If no aftercare information was supplied, ask the shop a precise question: “What date and method do you approve for the first hand wash of the refinishing system used on my vehicle?” That is more useful than asking whether the car is simply “safe to wash.”
Assemble a Low-Abrasion First-Wash Kit
Once the shop approves hand washing, build the process around control. The objective is not maximum foam, chemical strength, or water pressure. It is to limit abrasion and avoid unnecessary force around the repaired area.
A cautious first-wash kit includes:
- pH-neutral automotive shampoo
- A clean microfiber wash mitt
- One bucket for shampoo solution
- One bucket for rinse water
- A gentle source of low-pressure water
- Several clean, plush microfiber drying towels
- Separate tools and towels for the wheels
Prepare the shampoo according to its label. Do not combine products or add household detergent.
The two-bucket process helps limit transferred grit. After washing a small section, rinse the mitt in the plain-water bucket before returning it to the shampoo solution. This removes some collected dirt instead of repeatedly carrying it back to the paint.
Keep wheel-cleaning tools separate from bodywork tools. Brake dust, sand, and coarse road grime collected from wheels should not be carried onto the painted finish.
Avoid the following on curing paint unless the repairer explicitly approves them:
- Dish soap or laundry detergent
- Multipurpose household cleaners
- Solvents or adhesive removers
- Rough, dirty, or unknown towels
- Terry cloth and old bath towels
- Abrasive pads or scrubbing sponges
- Clay bars or clay mitts
- Scratch removers
- Rubbing or polishing compounds
- Hand or machine polish
- Wax, sealant, glaze, or spray protection
Microfiber is not automatically safe merely because of its label. A towel containing grit, dried product, or wheel residue can still mark a finish. As a conservative care practice, wash microfiber separately, omit fabric softener, and store clean towels away from dirty detailing tools.
Do not import pressure specifications from ordinary car-washing advice. The supplied evidence does not establish a universally safe PSI, flow rate, nozzle color, spray angle, or working distance for uncured repaired paint. For the first approved wash, “low pressure” should mean the gentle water method authorized by the body shop—not a pressure washer adjusted according to a generic chart.
The First Approved Hand Wash, Step by Step
Begin only after reaching the shop’s approved hand-wash date. If one panel, edge, or installed component remains restricted for longer, continue isolating it.
1. Choose shade and let the panels cool
Park out of direct sun and allow hot panels to cool. This is a cautious process recommendation, not a rule that changes the paint’s cure date.
2. Inspect the repair before adding water
Examine the repaired area in soft, diffuse light. Look across the finish and around panel boundaries, trim, seams, badges, handles, lamps, and moldings.
Stop and contact the shop if you notice:
- Soft or sticky areas
- Lifted paint or clear-coat edges
- Haze or cloudiness
- New discoloration
- Apparent color mismatch
- Blotchy or inconsistent sheen
- Loose trim or badges
- Visible movement around repaired seams
Do not probe a suspicious area with a fingernail, hard tool, or towel.
3. Pre-rinse gently
Use a gentle stream of water to release loose dust and dirt. Keep concentrated water away from painted edges, panel seams, trim, badges, moldings, and installed parts.
A hose rinse and a pressure-washer jet are not equivalent. If the shop approved only a low-pressure rinse, do not substitute a self-service wand or pressure washer.
4. Mix the shampoo as directed
Follow the shampoo manufacturer’s label for the product-to-water ratio. Use clean buckets and a clean mitt. If a bucket contains sand, wheel residue, or dried chemicals, clean it first or use another one.
5. Wash from the top downward
Begin with the roof and upper glass, then move down the body.
Use light, straight, overlapping passes. Let the shampoo’s lubrication and repeated gentle coverage do the work. Do not bear down, scrub in aggressive circles, or repeatedly work the repaired panel in an attempt to make it feel perfectly smooth.
Commercial repair guidance commonly favors pH-neutral automotive soap, microfiber tools, top-to-bottom washing, separate wash and rinse buckets, and light straight strokes for an approved first wash, as summarized in Dimmitt Collision’s cleaning guide.
6. Rinse the mitt frequently
After each small section, rinse the mitt in the plain-water bucket and gently release collected dirt. Then reload it from the shampoo bucket.
If the mitt falls on the ground, stop using it until it has been thoroughly cleaned. Change visibly dirty rinse water, and replace a mitt that retains particles you cannot rinse away.
7. Rinse thoroughly
Remove the shampoo with low-pressure water. Work methodically so residue is not left around mirrors, handles, trim, badges, panel gaps, or repaired edges.
If residue appears trapped in a seam, do not attack it with a concentrated jet or hard implement. Ask the body shop to address material that cannot be removed by the approved gentle method.
8. Dry with minimal contact
The cited commercial sources disagree about air-drying: one permits it, while others favor prompt microfiber drying to reduce water spots. The more cautious default is to use clean, plush microfiber towels with gentle patting or light, minimal-pressure passes.
Change towels as they become saturated or dirty. Do not drag a heavy wet towel across the finish, press hard on a mark, or use a wheel towel on painted bodywork.
9. Inspect and document the finish
After drying, examine the repaired area in diffuse light. If you see an unexpected change in gloss, color, texture, or edge condition, photograph it before doing anything else.
Do not try to correct a suspicious area with polish, compound, clay, solvent, glaze, or wax. Let the shop inspect the finish in its unaltered condition.
Handle Bird Droppings, Sap, Salt, and Other Urgent Contamination Carefully
Localized contamination is different from a routine full wash. Bird droppings, sap, insects, road film, or salt may create a reason to act while normal washing remains restricted, but urgency does not justify aggressive cleaning.
Whenever possible, request the body shop’s approved spot-cleaning procedure, especially during the earliest aftercare period. Tell the shop what is on the vehicle, where it landed, and how long it has been present.
A cautious spot-cleaning process is:
- Photograph the area before touching it.
- Hold a clean, damp microfiber over the deposit to soften it.
- Gently dab or lift rather than scraping, picking, or scrubbing.
- Turn to a clean part of the towel after each contact.
- Stop if the deposit does not release with gentle treatment.
- Photograph the area again after cleaning.
Auto Clinique similarly recommends gently dabbing contaminants with clean damp microfiber and contacting the repair shop when a spot does not release easily in its repaired-finish aftercare guidance.
Do not make repeated forceful passes. If the contaminant remains, ask the body shop to remove it rather than escalating to household cleaner, solvent, adhesive remover, clay, compound, scratch remover, or polish.
Do not assume that a generic waterless-wash product is compatible with every refinishing system merely because its label describes it as gentle. The supplied evidence does not establish universal compatibility.
For widespread road salt or dirty spray that cannot be handled locally, ask whether the shop permits a plain, low-pressure rinse before the normal first-wash date. The answer may depend on the repaired finish and any installed components.
Capture the entire panel and a close view, and retain the original files. Documentation does not establish what caused an irregularity, but it records what appeared and when.
Why Brush, Touchless, and Pressure Washing Need Separate Approval
“Automatic car wash” can describe several different processes. They should not be treated as interchangeable after body repair.
Brush-style automatic washes
Brushes, rollers, or cloth strips physically contact the vehicle. The equipment can carry particles across the paint and produce fine scratches or swirl marks. This contact risk exists on ordinary paint and warrants additional caution around a recently repaired finish; Affordable Tires & Auto Repair’s comparison likewise identifies brush contact and carried particles as abrasion concerns.
The source-specific waiting periods in the timeline range from at least 30 days to six weeks for automated or high-pressure washing. Those figures are commercial recommendations, not universal deadlines.
Touchless automatic washes
A touchless wash removes brush contact, but that does not make it automatically suitable for recently repaired paint. Such systems may rely on high-pressure jets and strong detergents to compensate for the lack of physical contact.
Oil Changers advises obtaining the paint shop’s approval before using touchless equipment on a new finish, citing pressure and detergent strength as concerns in its touchless-wash discussion.
Do not interpret “touchless” as “fresh-paint approved.” Approval for a gentle hand wash does not necessarily cover automated touchless equipment.
Self-service wands and home pressure washers
Until the shop approves pressure washing:
- Do not direct a jet at painted edges or panel seams.
- Do not chase dirt from gaps with concentrated spray.
- Avoid concentrated pressure around trim, badges, decals, or moldings.
- Do not use water pressure to test whether an installed part is secure.
- Do not rely on generic PSI, nozzle color, angle, or distance as proof of safety.
These are conservative isolation precautions, not universal compatibility rules for every trim system, adhesive, sensor, or installed component. Component-specific instructions should come from the repairer or installer.
After automated washing is approved, a correctly performed hand wash remains the most controllable method because you control the soap, water force, tools, and contact. Touchless washing may then be an automated option, but detergent strength and water pressure still matter. Brush washing continues to involve direct mechanical contact.
Clean the Rest of the Vehicle Without Exposing the Repair
You may be able to clean the interior, wheels, glass, or unrestricted panels while the repaired section remains off-limits. Treat this as an isolation strategy: keep runoff, overspray, pressure, and dirty tools away from the repair.
For the interior:
- Do not rest a vacuum, hose, cord, bottle, or tool against repaired exterior panels.
- Keep dirty towels and floor-mat brushes away from the body.
- Be cautious around door jambs next to newly painted edges.
- Avoid spilling cleaner through an open door onto adjacent paint.
For wheels:
- Use dedicated wheel tools and towels.
- Keep wheel-cleaning residue away from newly painted surfaces.
- Do not carry a wheel mitt or brake-dust towel over the body.
- Clean your hands before touching painted panels after wheel work.
These are conservative handling practices intended to maintain separation; they are not evidence that every wheel product or runoff pattern will damage a repaired finish.
When cleaning glass or trim near the repair, apply cleaner to the towel where practical rather than spraying broadly. This helps limit overspray without making a universal claim about product compatibility.
Do not pick material from repaired seams with a screwdriver, scraper, fingernail, or other hard edge. If it cannot be removed gently by the shop-approved method, ask the shop to address it.
Until normal washing is approved, avoid flooding:
- Panel gaps and repaired seams
- Replacement trim and moldings
- Badges and emblems
- Decals or stripes
- Cameras and parking sensors
- Adhesive-mounted parts
- Newly installed lamps or exterior accessories
The supplied sources do not establish detailed compatibility rules for every adhesive, decal, camera, sensor, trim system, or bonded component. Instructions for those parts must come from the repairer that installed them.
Resume whole-car washing only when it can be performed without violating the repaired area’s restrictions. If washing an adjacent panel inevitably sends runoff or spray across the repair, postpone it or ask the shop for an approved method.
Delay Wax, Polish, Sealant, and Coatings Until Separately Approved
Permission to wash is not permission to detail aggressively or apply protection. Washing, decontaminating, claying, polishing, waxing, sealing, ceramic coating, and installing paint protection film involve different products, levels of contact, and application processes.
Published protection schedules conflict. Eustis Body Shop recommends delaying wax for at least 30 days, or longer when instructed.
Becker Body Shop recommends approximately 60–90 days before applying wax or sealant.
Dynasty Auto Body also recommends approximately 60–90 days before wax or sealant.
These are business-specific recommendations, not a universal protection schedule. Other supplied guidance emphasizes waiting for the applicable curing period and obtaining shop approval rather than relying on one date.
Request separate approval for every process you intend to perform:
- Chemical decontamination
- Clay bar or clay mitt treatment
- Scratch removal
- Hand polishing
- Machine polishing or compounding
- Glaze
- Wax
- Synthetic sealant
- Ceramic spray or ceramic coating
- Paint protection film
- Decals, stripes, or wraps
Do not use clay, scratch remover, abrasive polish, or compound while paint is curing. These are correction or decontamination processes, not ordinary washing steps.
After approval, choose products compatible with the refinishing system and follow both the repairer’s instructions and the product label.
Stop cleaning and call the shop if the finish appears soft, sticky, lifted, hazy, discolored, mismatched, or uneven in sheen.
Photograph the condition and allow the shop to inspect it before applying another cleaning or detailing product. Do not assume the cause or attempt to disguise the area with polish, glaze, wax, solvent, or coating.
Frequently Asked Questions
Can I wash my car immediately after body repair?
Not automatically. First determine whether the work included fresh paint, clear coat, blended refinishing, adhesives, trim, decals, or installed parts.
If no refinishing was performed, the shop may permit ordinary cleaning while imposing targeted restrictions around particular components. If fresh paint was applied—or the repair details are uncertain—follow the shop’s written first-wash date rather than a generic commercial recommendation.
Urgent localized contamination may require careful spot cleaning before a full wash is approved. Ask the shop for its procedure.
Is a touchless car wash safe after a new paint job?
Not merely because it has no brushes. Touchless equipment avoids direct brush contact but may use concentrated water pressure and strong detergents.
Obtain separate approval for a touchless wash. Do not assume that approval for a gentle hand wash also covers automated equipment.
After automated washing is approved, touchless equipment may be preferable to a brush-style system because it avoids brush contact. A careful hand wash remains the most controllable method.
What should I do if bird droppings or sap land on curing paint?
Contact the shop for an approved spot-cleaning procedure when possible. Photograph the area, soften the deposit with clean damp microfiber, and gently dab or lift it. Do not scrape, pick, or scrub.
If it does not release easily, stop and ask the shop to remove it. Do not escalate to solvents, household cleaners, clay, compound, polish, or a waterless product of unknown compatibility.
For salt or contamination spread across a larger area, ask whether a gentle low-pressure rinse is permitted.
When can I wax, polish, seal, or ceramic-coat repaired paint?
Only after the repairing shop separately approves the specific process. The published dates vary substantially and do not establish a universal schedule.
Polish, compound, clay, wax, sealant, ceramic coating, and paint protection film should not be grouped under one approval date. Tell the shop exactly what you plan to use and ask whether it is compatible with the refinishing system.
How can I tell whether repaired paint has a problem?
Inspect the repair in diffuse light before and after cleaning. Stop if you observe softness, stickiness, lifting edges, haze, discoloration, apparent color mismatch, blotchy gloss, inconsistent sheen, or movement around repaired seams or trim.
Touch and appearance alone cannot confirm that paint is fully cured. An irregularity also does not prove that washing caused it. Photograph the entire panel and a close view, avoid further cleaning or correction, and let the repairing shop inspect the finish.
Pickup-to-First-Detail Checklist
- Confirm whether the repair included paint, clear coat, blended areas, or installed components.
- Obtain written dates for spot cleaning, the first hand wash, automatic or pressure washing, polishing, and protection.
- Spot-clean urgent contamination only by the shop-approved method.
- Complete the first approved wash with mild automotive shampoo, clean microfiber, separate wash and rinse buckets, and gentle low-pressure water.
- Keep brush, touchless, self-service, and pressure washing on separate approval timelines.
- Wait for explicit approval before using clay, polish, compound, wax, sealant, ceramic coating, or paint protection film.
- If the finish becomes soft, sticky, lifted, hazy, discolored, mismatched, or uneven, stop, photograph it, and return to the repairing shop rather than attempting a detailing correction.