
Should a Synthetic Clay Mitt Be in Your Detailing Kit?
Its larger face suits broad panels; a small bar handles badges, narrow pillars, and recesses. Both can mar paint, so inspect the finish before deciding to polish.
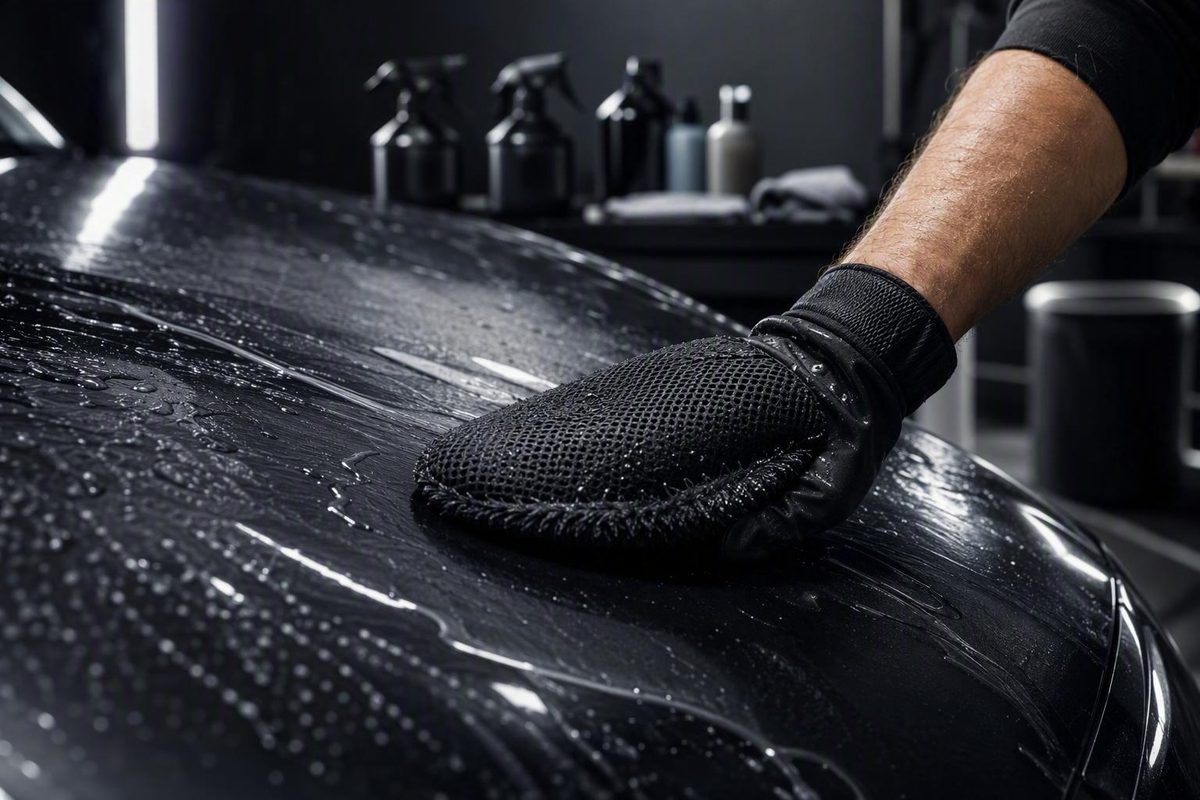
A clay bar mitt can be a useful addition to a detailing kit, especially when decontaminating a hood, roof, door, or another broad exterior panel. Its hand pocket and large synthetic-clay face make it easier to hold than a small piece of traditional clay, and many versions can be cleaned and reused.
That convenience does not make a mitt universally safer, faster, or more effective. A mitt can still mar paint. It may provide less feedback than kneadable clay, struggle around badges and recesses, or prove too aggressive for a finish that will not be polished afterward.
The practical choice depends on the contamination, surface, mitt grade, access, and intended next step. Confirm that bonded material remains after washing, use chemical decontamination where appropriate, and treat the mitt as one tool in a broader process—not as a replacement for careful inspection.
What a clay bar mitt does—and what it cannot do
A clay bar mitt is a hand-worn detailing tool with a synthetic, rubber-like clay surface. When moved over a lubricated exterior surface, that face mechanically lifts or shears away bonded above-surface contamination.
That differs from ordinary washing. Shampoo, water, and a wash mitt are intended to loosen and carry away loose dirt. Some particles and residues remain attached after the vehicle looks clean, leaving the finish rough, gritty, or lightly textured. Automotive clay is intended to remove this material rather than level the paint itself.
Representative targets include industrial fallout, rail and brake dust, overspray, road film, tar, tree-sap residue, and environmental deposits. Results vary with both the mitt and the contaminant; clay products do not remove every deposit equally well. Poor lubrication, excessive pressure, or contaminated material can also damage paint, as explained in Car and Driver’s overview of automotive claying.
Mechanical claying is not necessarily the first or only decontamination step. Grease, heavy tar, or stubborn sap can call for a surface-safe chemical treatment before the mitt touches the finish. Autofiber describes a sequence in which an iron remover addresses embedded iron before clay bars, towels, pads, or mitts collect remaining stubborn contamination in its paint-decontamination guide.
A clay mitt does not remove scratches. Scratches are defects in or below the paint surface; claying removes material sitting on or bonded to that surface. Although smoother paint may reflect light differently, meaningful scratch correction requires an appropriate polishing or paint-correction process.
A typical detailing sequence is:
- Wash the vehicle thoroughly.
- Assess the clean surface for bonded contamination.
- Use suitable chemical decontamination where the deposit calls for it.
- Mechanically decontaminate only the areas that still need it.
- Inspect for haze, scuffs, or micro-marring.
- Polish if necessary and appropriate.
- Apply or renew compatible protection.
The key distinction is that decontamination cleans the surface; polishing corrects defects in the finish.
How to tell whether the vehicle actually needs mechanical decontamination
Do not clay a vehicle simply because a fixed date has arrived. Begin by washing it thoroughly.
Once the paint is clean, inspect it visually and lightly feel a representative area. You may detect small bumps or a sandpaper-like texture even though the panel looks clean. Do not press down or rub repeatedly.
For a more sensitive test, place your clean hand inside a clean, thin plastic sandwich bag and glide it gently over the surface. The plastic amplifies small irregularities and makes bonded deposits easier to feel. A Hagerty comparison used this test and also reported less tactile feedback from synthetic formats than from traditional clay. That evaluation involved a towel and foam pad rather than a mitt, however, so it should not be generalized to every synthetic tool. See Hagerty’s clay-format comparison.
Test more than one location. One rough section does not prove that every panel requires the same treatment.
Treat roughness as a reason to investigate, not an instruction to scrub:
- Small metallic specks or suspected rail and brake dust: consider a compatible iron-removal step, then reassess.
- Isolated tar or grease: use a product documented for the affected surface and contaminant.
- Tree-sap residue: determine whether it is removable residue or a stain or defect that clay will not correct.
- Overspray or widespread bonded material: start with a test area and use the least aggressive compatible approach.
- A panel that already feels smooth: leave it alone unless another preparation requirement applies.
Calendar guidance such as every six months, yearly, or once or twice per year is only a broad reference. Outdoor parking, industrial or railway exposure, road conditions, mileage, maintenance habits, and actual surface feel are more useful decision factors. Chemical Guys gives general annual frequency suggestions while acknowledging that exposure changes the need in its claying guide.
Stop and check documentation before testing a matte or satin finish, wrap, paint-protection film, ceramic-coated surface, damaged clear coat, peeling paint, or recently repainted panel. Proceed only when the mitt maker, lubricant maker, and surface or coating manufacturer provide compatible instructions. When documentation is missing or contradictory, avoiding the mitt is safer than assuming compatibility.
Clay mitt vs. clay bar: choose by job, not marketing
Neither format wins every comparison. A mitt is often more convenient on broad panels, while traditional clay remains useful where precision, conformity, and feedback matter.
| Consideration | Synthetic clay mitt | Traditional clay bar |
|---|---|---|
| Working area | Large face suits roofs, hoods, doors, and other broad panels | Covers less area per pass but allows localized placement |
| Grip | Hand pocket can provide a secure, convenient hold | Must be held as a flattened piece and periodically reshaped |
| Tactile feedback | The backing and broad face may make individual deposits harder to feel | Direct contact with malleable clay can make drag and contamination easier to detect |
| Tight spaces | Can be awkward around badges, narrow pillars, recesses, and sharp body lines | Can be divided and shaped for intricate areas |
| After a drop | May be rinsed and inspected if the manufacturer allows it | Generally discarded because ground grit can become embedded |
| Contamination visibility | Deposits can be difficult to see against the synthetic face | Collected contamination is often visible, and the bar can be folded to expose clean material |
| Likely use | Light-to-moderate decontamination across broad, accessible areas | Local deposits, tight spaces, detailed work, or situations requiring clearer feedback |
| Possible marring | Can mar, haze, scuff, or scratch if aggressive, dirty, dry, or misused | Can also mar or scratch if aggressive, dirty, dry, or misused |
Direct comparative evidence for mitts is limited. Hagerty’s observations about feedback and visible contamination came from one comparison involving a traditional bar, synthetic towel, and foam pad—not a mitt—and should be read as an indication of possible format differences rather than a universal rule.
The mitt’s main ergonomic advantage is straightforward: it covers a larger area and stays around the hand. That can make long, open panels more manageable. It also eliminates the repeated flattening and kneading associated with conventional clay.
Traditional clay has different strengths. It can be divided and shaped around emblems, mirrors, trim edges, body lines, narrow pillars, and localized deposits. It also makes collected grime easier to see because you can inspect and fold the material. That feedback helps reveal when it is time to expose a clean face or discard the piece.
The drop distinction is useful but frequently overstated. A dropped traditional bar should normally be discarded because grit can become embedded where it cannot be reliably removed. Many synthetic mitts can be rinsed, but rinsing is not proof that every abrasive particle is gone. The face and edges still require close inspection, and uncertainty should result in replacement rather than a risky return to paint.
Sellers often describe mitts as faster, easier, more durable, or less wasteful. Those claims are plausible consequences of the larger working face and washable construction, but the available evidence does not establish universal advantages through controlled testing. Performance also depends on grade, contamination, lubrication, paint hardness, technique, and panel access.
A customer review displayed on Adam’s product page said the mitt was convenient for light contamination but that traditional clay was still needed for heavier deposits. Meanwhile, community users have reported both useful results and visible scuffs. These are individual experiences, not universal performance rules.
The most practical answer is often to keep both:
- Use a mitt on broad, accessible panels.
- Use a small clay bar around badges, narrow pillars, recesses, and stubborn localized deposits.
- Switch to chemical treatment when the contaminant is better dissolved than mechanically rubbed.
- Stop rather than escalating pressure when neither tool releases the deposit easily.
Clay towels, sponges, pads, pucks, and machine-mounted discs are other synthetic formats. Their most obvious differences are how they are held, how well they conform, and where they can reach. A towel may fold around shapes, a puck or sponge provides a compact grip, and a disc can cover an area by machine. Those handling differences do not establish that one format is inherently safer or more effective.
How to choose a mitt without relying on a best-overall label
A “best clay bar mitt” label is not meaningful unless the comparison accounts for the vehicle, contamination, grade, lubricant, and intended follow-up. Use a documentation checklist instead.
Before buying, look for:
- A disclosed fine, medium, or other grade
- Explicit compatible surfaces
- Required or permitted lubricants
- First-use or break-in instructions
- Cleaning and rinsing directions
- Warnings about solvents or other chemicals
- Dimensions and working-face construction
- Storage instructions
- Warranty and return terms
- Replacement criteria
- Current availability
Grade matters, even though the available evidence does not quantify how each grade performs. A more aggressive or medium-grade face may be intended for stronger decontamination, but it can also increase the likelihood that polishing will be needed. Adam’s identifies its mitt as medium grade and warns that light micro-marring may require correction, particularly when the mitt is used before a planned machine polish. Its claimed reuse range of 20–40 uses is a seller estimate rather than a standardized lifespan, as shown on the Adam’s clay mitt product page.
Specification gaps are common. Listings may omit dimensions, grade, synthetic formulation, expected lifespan, storage requirements, or objective replacement indicators.
First-use preparation is particularly product-specific. One documented mitt requires its protective surface coating to be rubbed on lubricated glass for 30–60 seconds, until the milky residue clears. The same seller says the mitt is not solvent resistant and recommends removing tar or grease before using it. Those directions illustrate why buyers should read the exact mitt’s preparation and chemical-compatibility instructions.
Ethos Car Care, by contrast, suggests softening its new mitt by soaking it or using it during several washes. Do not combine procedures from unrelated products. A mitt designed for a lubricated-glass break-in should receive that preparation; another formulation may require soaking, washing, or no break-in at all. Follow the directions supplied for the exact tool, as illustrated by the product-specific variation in the Ethos clay-mitt guide.
Likewise, do not assume that every synthetic face tolerates tar remover, solvent, concentrated cleaner, or the same soap solution. Documented solvent restrictions differ by product. If prohibited chemical contact causes visible damage or an abnormal change in the synthetic face, retire the mitt.
Reuse figures should also be treated as seller claims. Adam’s states a range of 20–40 uses, while an Ethos demonstration claims up to 50 uses for its featured mitt. There is no shared definition of one use: a lightly contaminated hood is not equivalent to a heavily contaminated truck. Cleaning, chemical exposure, storage, dropped-tool incidents, and panel condition can also affect service life.
Avoid a mitt when the seller provides too little information to determine:
- Which lubricant is acceptable
- Whether break-in is required
- Which surfaces are supported
- How the face should be cleaned
- What chemical contact must be avoided
A reusable tool is not a bargain if its safe operating conditions are unknowable.
Step by step: how to use a clay mitt with less risk of marring
No process can make mechanical decontamination risk-free, but careful preparation can reduce avoidable marring.
Gather these materials first:
- Instructions for the exact mitt
- A clay-compatible lubricant approved by its maker
- Clean microfiber towels
- Normal wash and rinse supplies
- Clean water for frequent mitt rinsing
- Bright inspection lighting
- Surface-appropriate chemical decontaminants, if needed
- Optional traditional clay for tight areas
- Appropriate drying and post-treatment products
1. Wash thoroughly and identify the contamination
Remove loose dirt before placing the mitt on the vehicle.
If iron particles, tar, grease, or stubborn sap are suspected, consider a compatible chemical step first. Follow that product’s surface, dwell-time, temperature, rinsing, and personal-protection instructions. Reassess afterward rather than automatically claying every panel. Thorough washing, ample lubrication, light pressure, and clean tool surfaces are recurring safeguards in Car and Driver’s claying procedure.
2. Work on a cool surface
Move the vehicle out of direct conditions that would make the lubricant or wash solution dry prematurely. The panel should remain cool enough for the selected product to stay wet and behave as directed.
Do not continue where lubricant is evaporating, streaking dry, or becoming tacky. Re-wet the area or stop and move the vehicle. One manufacturer’s directions specifically call for a clean, cool, lubricated surface and light pressure.
3. Complete the specified first-use preparation
Read the mitt instructions before touching paint. If the manufacturer requires a lubricated-glass break-in, complete it exactly as directed. If the maker specifies soaking, washing, or another conditioning procedure, follow that procedure instead.
Do not assume that a new synthetic face is ready for paint simply because it feels soft.
4. Test an inconspicuous compatible area
Lubricate both the small test area and the mitt, unless the product instructions specify otherwise. Use very light pressure, make a few controlled passes, then clean and inspect the section under strong lighting.
The test should answer four questions:
- Does the mitt glide without chatter?
- Does the lubricant stay slick?
- Does contamination release with light passes?
- Does the surface remain free from visible haze or scuffs?
If the test fails, do not move to a prominent hood or door. Product directions that require lubrication of both the surface and mitt, a preliminary test, and frequent inspection appear on the Leno’s Garage mitt page.
5. Divide the vehicle into small sections
An area of approximately 2 by 2 feet is a common practical reference, not a mandatory measurement. Smaller areas make it easier to maintain lubrication, monitor drag, and inspect progress. Ethos recommends small sections, ample lubricant, and light pressure in its clay-mitt procedure.
Reduce the section size further on curved panels, heavily contaminated areas, or in conditions where the lubricant is drying quickly.
6. Lubricate the panel and synthetic face generously
Apply enough approved lubricant to create a visibly wet, slick interface. Lubricating only the panel may leave dry spots on a large mitt face, so wet both surfaces when the product directions require it.
“Generous” does not mean flooding the entire vehicle at once. It means maintaining a continuous lubricating film in the active section. Reapply as soon as glide deteriorates.
7. Glide with light pressure
Lay the mitt flat where the panel shape permits. Use short, controlled, overlapping passes. Some manufacturers specify straight back-and-forth lines; others specify a cross-hatch pattern. The evidence does not establish that either pattern is inherently safer.
The priorities are:
- Minimal downward pressure
- A clean mitt face
- Constant lubrication
- Controlled movement
- No forceful scrubbing
- No dry passes
Let the synthetic face contact the deposits. These light-pressure and lubrication precautions are also reflected in Leno’s comparison of clay bars and mitts.
8. Stop as resistance decreases
A contaminated section may initially feel slightly resistant. As bonded material releases, the mitt should glide more freely. Do not keep rubbing a smooth section merely to complete a predetermined number of passes.
Wipe or rinse the section as directed, then inspect it. Check both surface feel and appearance. Smoothness alone is not enough if the process has introduced haze.
9. Rinse and inspect frequently
Rinse at least between panels, and sooner whenever:
- The mitt feels gritty
- Glide changes unexpectedly
- Visible contamination collects on the face
- The mitt touches an unintended dirty area
- A section requires more passes than expected
Inspect the complete face and edges, not merely the center. Contamination may be harder to see on dark or textured synthetic material than on foldable clay. Synthetic-tool demonstrations consistently stress ample lubrication and frequent cleaning, while warning that dry claying can scratch paint; the handling differences are shown in this clay-format comparison video.
10. Switch tools in tight areas
Do not force a broad mitt into a body line, around a badge, or between closely spaced trim.
Use a small, clean piece of compatible traditional clay where more precise control is needed. If the area is delicate or its surface compatibility is unclear, leave it untreated until you can confirm the correct procedure.
Stop immediately if the lubricant begins drying, the mitt chatters or drags persistently, the synthetic face feels gritty or appears damaged, visible marks develop, compatibility becomes uncertain, or contamination does not release with light passes. Diagnose the cause before continuing.
Marring, scuffs, and other problems: prevention and troubleshooting
A clay mitt can cause micro-marring, haze, scuffs, or scratches. No clay format should be described as risk-free.
Common contributors include:
- Too little lubricant
- Excessive pressure
- Forceful or prolonged scrubbing
- An aggressive mitt grade
- Trapped grit
- Reuse of a contaminated tool
- A damaged or chemically affected face
- An unsuitable or delicate surface
- Continuing after the lubricant starts to dry
The risk can be acceptable in a planned correction workflow, where decontamination is followed by polishing. It may be less acceptable on soft paint, a vehicle that will not be polished, or a preservation-focused finish. That is why a medium-grade mitt marketed for pre-polish preparation should not automatically be chosen for routine maintenance.
Participants in an Adam’s forum discussion described skid or scuff marks after clay-mitt use, with some reporting that polishing removed them. These anecdotes establish that visible marking is possible, but not how often it occurs or how every product behaves; the tools, paint, pressure, and lubrication were not controlled. Those limitations are apparent in the forum discussion of clay bars and mitts.
| Symptom | Likely concern | Response |
|---|---|---|
| Drag or chatter | Inadequate lubricant, a dry patch, contamination, or an incompatible combination | Stop, add approved lubricant, and inspect both surfaces before testing again |
| Visible grit on the mitt | Abrasive material may be trapped in the synthetic face | Remove the mitt, rinse thoroughly, and inspect; discard it if cleanliness is uncertain |
| Little or no removal | Wrong contaminant, insufficient chemical pretreatment, tool too mild, or deposit not above the surface | Reassess the deposit; use a suitable chemical or more precise tool rather than more pressure |
| Haze, skid marks, or scuffs | Marring from friction, grade, debris, pressure, or incompatibility | Stop, clean the section, inspect under strong lighting, and decide whether appropriate polishing is required |
| Cuts, peeling, or altered tackiness | Worn, damaged, or chemically affected synthetic material | Retire the mitt |
| Marks remain after cleaning | The issue may be a paint defect rather than residue | Seek an informed correction assessment before applying more products |
Do not answer stubborn contamination by pressing harder. Change the process: identify the deposit, use an appropriate chemical treatment, switch to a smaller clay tool, or consult a professional when the paint or contamination is uncertain.
Nor should tar remover or polishing be prescribed as a universal remedy for clay-mitt marks. A forum user’s successful correction method does not prove that the same product or process is safe for another surface. Residue, transfer, micro-marring, and deeper scratches require different responses.
Protection is not a substitute for inspection.
Surface compatibility and post-clay decisions
Compatibility varies among mitts. A material listed for one brand cannot be assumed safe for another, and an approved surface can still be unsuitable if it is hot, damaged, freshly repaired, contaminated with grit, or paired with the wrong lubricant.
| Surface | Cautious guidance |
|---|---|
| Gloss paint and clear coat | Commonly listed, but verify mitt grade, lubricant, paint condition, and whether polishing is planned |
| Smooth exterior glass | Commonly listed and sometimes used for mitt break-in; avoid damaged films, coatings, or adjacent sensitive trim unless approved |
| Wheels | Product-dependent; wheel finish, contamination, temperature, and prior chemical exposure matter |
| Chrome or polished metal | Product-dependent; test first and confirm the finish is supported |
| Gelcoat | Listed by some sellers, not universally |
| Headlights or clear plastics | Product-dependent; plastic can mark, and not every mitt maker lists it |
| Smooth trim | Product-dependent and easily confused with textured or delicate trim |
| Textured trim | Evidence gap; do not assume compatibility |
| Matte or satin finish | Avoid unless both surface and mitt manufacturers expressly approve the process |
| Vinyl wrap | Evidence gap; follow the wrap and mitt makers’ instructions |
| Paint-protection film | Evidence gap; film type, age, topcoat, and edge condition can matter |
| Ceramic-coated surface | Evidence is conflicting and product-specific; confirm with the coating and mitt makers |
An Ethos demonstration lists paint, glass, headlights, trim, and wheels but specifically excludes matte and satin finishes. Because that is product guidance rather than universal validation, it supports checking documentation—not transferring the same compatibility list to every mitt. See the Ethos clay bar and mitt demonstration.
After claying, choose between two paths:
If inspection reveals no visible marring: remove residue or rinse and dry as directed, then renew suitable protection.
If haze, scuffs, or micro-marring are present: assess whether polishing is appropriate for that finish. Correct the defects first, then complete the final cleaning and protection steps.
Mechanical decontamination may affect existing wax, sealant, spray protection, or coating behavior, but the evidence does not support assigning a uniform or quantified effect. Inspect the surface and renew compatible protection as needed rather than assuming the previous layer is unchanged.
Preparing for a ceramic coating also involves more than making the paint feel smooth. Follow the coating manufacturer’s complete requirements for correction, cleaning, residue removal, environmental conditions, and application. A quick mitt pass does not by itself constitute coating preparation.
Cleaning, drop recovery, storage, and replacement
Rinse the synthetic face frequently during use. After completing the vehicle, clean it as the manufacturer directs. Some products call for a thorough water rinse, but drying and storage instructions should remain product-specific because formulations and backing materials differ.
If the mitt falls on the ground:
- Stop using it immediately.
- Rinse the face, seams, and edges thoroughly.
- Inspect it visually under strong light.
- Check cautiously for embedded grit without rubbing the questionable face against paint.
- Return it to service only if the maker permits rinsing after a drop and you are confident it is completely clean.
- Discard it when grit cannot be removed or cleanliness remains uncertain.
That recoverability is an advantage over traditional clay, which is generally discarded after a drop. It is not a guarantee that the mitt is safe. Rinsing and careful inspection remain conditions of reuse, as emphasized in the clay-bar-versus-mitt guidance linked above.
Contamination may be difficult to see on a mitt because the face cannot be kneaded open like traditional clay. Frequent visual and tactile inspection is therefore important even when the surface appears clean.
Replace the mitt when you find:
- Embedded grit that will not rinse away
- Cuts, peeling, or separation from the backing
- Hardening or an abnormal change in tackiness
- Persistent contamination that affects glide
- Exposure to a chemical prohibited by the manufacturer
- Damage associated with cleaning or storage
- Any uncertainty about whether the face is clean enough for paint
These are conservative inspection indicators, not a validated lifespan formula. Seller estimates such as 20–40 or 50 uses should not be converted into a promised number of vehicles or a precise cost per detail.
Before every decontamination job, use this checklist:
- Inspect the complete synthetic face and edges.
- Confirm that the required first-use preparation has been completed.
- Verify the approved lubricant.
- Confirm compatibility with the exact surface.
- Check that the face has not been exposed to prohibited chemicals.
- Keep rinse water and clean towels ready.
- Replace the mitt whenever safe cleanliness is in doubt.
A clay bar mitt earns its place as a broad-panel tool, not as a universal replacement for traditional clay. Confirm that bonded contamination remains after washing, use chemical treatment where appropriate, select a documented and surface-compatible mitt, lubricate generously, apply minimal pressure, and inspect constantly. Switch tools or stop when access, contamination, or finish condition calls for a different approach. Finally, inspect for marring and restore suitable protection rather than assuming the job is complete merely because the paint feels smoother.
Frequently asked questions
Can a clay bar mitt scratch or mar clear coat?
Yes. Insufficient lubricant, excessive pressure, forceful scrubbing, trapped debris, an aggressive grade, or an unsuitable surface can cause haze, micro-marring, scuffs, or scratches. A medium-grade mitt may be intended for use before polishing rather than as a no-correction maintenance tool.
Test an inconspicuous area, keep the interface wet, use minimal pressure, and stop as soon as visible marks or persistent drag appear.
Can I use soapy water instead of dedicated clay lubricant?
Sometimes, but only when the exact mitt manufacturer permits it. Some sellers list soapy water as an option, while other products specify clay lubricant, detail spray, waterless wash, or a proprietary product. Soap concentration and synthetic-material compatibility are not standardized.
Cerakote, for example, instructs users to wet and lubricate its medium-grade mitt with soapy water or detailing spray on the product page. That does not establish compatibility for unrelated mitts. Follow the instructions for yours and ensure that the mixture remains slick rather than drying on the panel.
Can I rinse and reuse a clay mitt after dropping it?
Potentially. Stop, rinse the entire face and edges thoroughly, and inspect for embedded grit. Reuse it only if the manufacturer allows drop recovery and you can confidently verify that it is clean and undamaged.
If grit remains, the face feels abnormal, or you are uncertain, discard the mitt. Rinsing makes recovery possible; it does not guarantee that every abrasive particle has been removed.
Will a clay mitt remove scratches from car paint?
No. A clay mitt removes bonded material above the paint surface. It does not level clear coat or remove scratches below the surface.
If scratches or fresh marring are present after decontamination, inspect them under good lighting and determine whether appropriate polishing or professional correction is needed.
How often should I use a clay mitt on my car?
Use it according to need rather than a rigid calendar. Wash the vehicle, assess representative panels, and use the plastic-bag test if necessary. Mechanically decontaminate only where bonded contamination remains.
A vehicle parked outdoors near industrial fallout, rail lines, trees, or heavily traveled roads may need attention sooner than a sheltered vehicle. Conversely, paint that feels smooth after washing and chemical decontamination does not benefit from unnecessary claying. Published suggestions ranging from every six months to once or twice per year are broad starting points rather than treatment requirements; exposure and surface condition should determine the actual interval.