
A Least-Aggressive-First Method for Stripping or Correcting a Ceramic Coating
IPA and panel prep are not reliable primary removers of cured coating. On gloss paint, rule out contamination, then test a light polish before escalating.
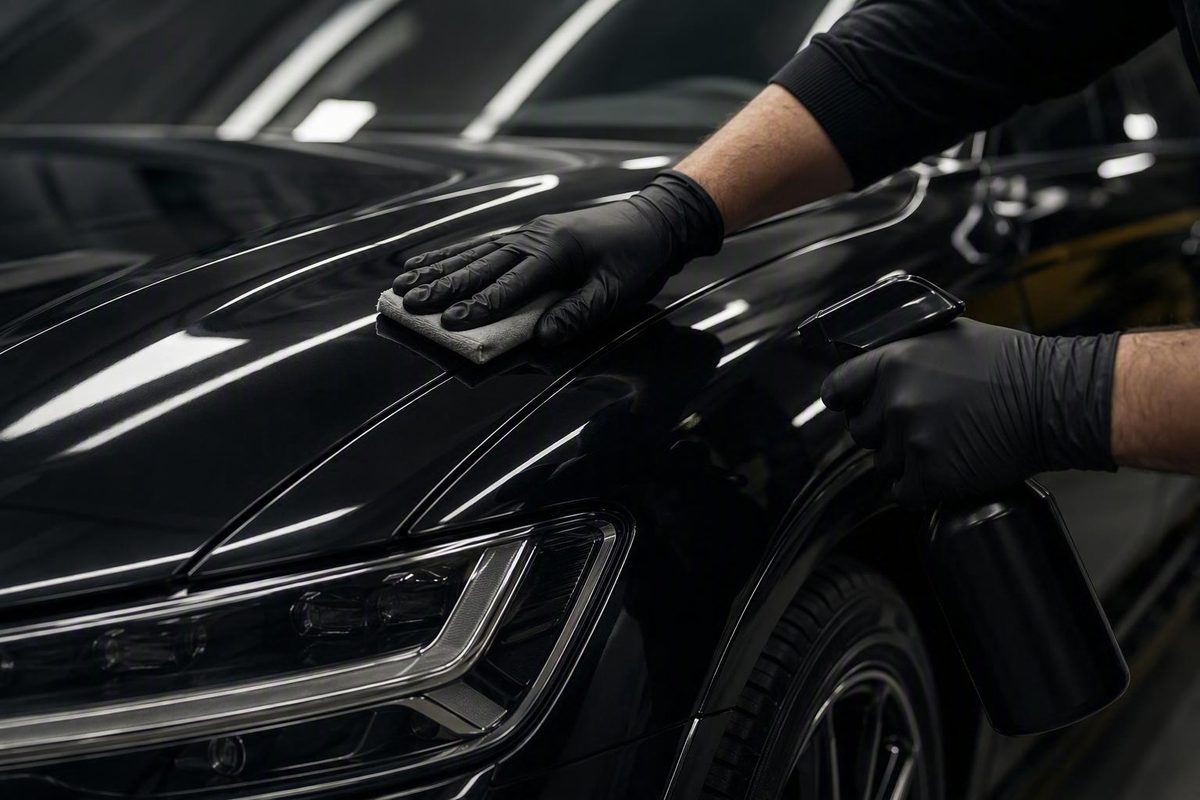
A fully cured ceramic coating on glossy automotive paint generally will not wash or wipe away like ordinary residue. When the bonded coating itself must be removed, controlled abrasive polishing is the most consistently supported practical method.
That does not mean starting with compound. First determine whether the problem is contamination, a localized application defect, uneven wear, or an intact coating that genuinely needs stripping. Then test the least aggressive process likely to work.
This distinction matters because mechanical correction can remove both the coating and some underlying paint or clear coat. A documented high-spot repair, for example, emphasizes that abrasion removes coating while also affecting some amount of paint (Mike Phillips’ high-spot demonstration). The objective is therefore the minimum correction needed for a uniform, usable finish—not unlimited polishing until every ambiguous sign disappears.
This guide applies primarily to conventional glossy automotive paint. Matte paint, glass, repainted panels, thin or unknown clear coat, and professional multilayer systems require a different level of caution.
First Decide What Actually Needs to Be Removed
Before deciding how to remove ceramic coating, establish whether removal is necessary at all. Reduced gloss, roughness, weak beading, patchy water behavior, or difficult cleaning can suggest declining protection, but those symptoms can also result from road film, mineral deposits, wash residue, polishing oils, waxes, sealants, ceramic toppers, or uneven contamination.
Wash the vehicle thoroughly, then clean and inspect a small control area. If that section recovers its gloss, smoothness, or water behavior after decontamination, the coating may have been clogged rather than failed. This diagnostic step can prevent unnecessary polishing and clear-coat loss.
Most coating problems fit one of five scenarios:
- A fresh high spot within the product’s working window. A high spot is excess coating left after application. It may look like a smear, streak, oily patch, rainbow mark, or darker area. If it has not cured, the manufacturer’s leveling process may still correct it.
- A cured localized high spot. Once excess coating has hardened, a towel alone may no longer level it. Local polishing is usually more appropriate than stripping an entire vehicle.
- Contamination that makes a healthy coating appear weak. Road film, minerals, tar, iron fallout, maintenance products, or residue may suppress gloss and repellency. Cleaning and decontamination should come first.
- An aged, damaged, or patchy coating. If cleaning does not restore a reasonably uniform finish, panel-wide or full-vehicle polishing may be warranted.
- Removal for another operation. Paint correction, repainting, bodywork, or installation of a replacement coating may require removal from the affected area.
A single high spot is not the same problem as an entire failed coating. Spot correction can preserve more clear coat, while widespread patchiness may justify treating a complete panel for a uniform result. Full-vehicle removal is more reasonable when the coating is broadly inconsistent or comprehensive paint correction is already planned.
Do not assume every scratch visible beneath the coating should also be removed. The coating may polish away before the scratch does. Chasing a deeper defect can require substantially more clear-coat removal than coating removal alone.
If the coating was professionally installed, is covered by a warranty, or consists of multiple layers, identify it before beginning abrasive work. Ask the installer or manufacturer what was applied, how many layers were installed, whether only a top layer needs correction, and how polishing affects warranty coverage. User reports from detailing forums indicate that removal difficulty varies considerably: some coatings respond to finishing polish, while others require more corrective abrasion (discussion of coating-dependent removal).
What Each Removal Method Can—and Cannot—Do
Treat the available methods as an escalation ladder. Washing, chemical decontamination, claying, panel preparation, polishing, compounding, and sanding perform different jobs; they are not interchangeable coating removers.
| Method | Useful for | Do not assume it will |
|---|---|---|
| Automotive stripping wash | Removing waxes, toppers, oils, weak protection, and surface residue | Dissolve every fully cured coating |
| Chemical decontamination | Removing identified iron fallout, tar, minerals, or similar contamination | Strip an intact coating without product-specific evidence |
| Clay | Lifting bonded contamination and possibly loose residue | Dependably remove a cured ceramic layer |
| IPA or panel prep | Removing polishing oils, fingerprints, and preparation residue | Act as the primary remover of cured coating |
| Finishing or light polish | Testing light coating removal or correcting a small high spot | Work on every coating or paint system |
| Corrective polish or compound | Removing more resistant coating and correcting related paint defects | Preserve all underlying clear coat |
| Wet sanding | Exceptional body-shop preparation or advanced correction | Serve as the routine next step after polishing |
Stripping wash
An automotive stripping shampoo can provide a useful diagnostic reset. It may remove maintenance waxes, ceramic sprays, toppers, oils, and residue that make the coating’s condition difficult to interpret. It may also weaken deteriorated protection.
It should not be presented as a guaranteed remover for every cured coating. Commercial guidance that recommends a staged wash process also acknowledges that stronger or professionally installed coatings may remain and require polishing (Chemical Guys’ staged removal process). Use a stripping wash to clean and diagnose, not as proof that the paint is bare.
Clay
Clay bars, towels, and mitts remove bonded material that normal washing leaves behind. They may help lift loose or deteriorated residue, but their principal purpose is decontamination. An intact cured coating should not be expected to disappear simply because the paint was clayed.
Clay can also mar paint, particularly when the surface is dirty, lubrication is inadequate, or the clay media becomes contaminated. Use it only where touch or close inspection indicates bonded contamination. Do not clay the entire car automatically just because coating removal is planned.
Isopropyl alcohol and panel prep
Isopropyl alcohol and dedicated panel-preparation products are useful after polishing because they remove oils that can temporarily fill haze or alter water behavior. They also prepare clean paint for inspection and, where permitted by the replacement product, recoating.
They are not reliable primary removers of a cured ceramic coating. Commercial detailing guidance specifically distinguishes IPA’s ability to remove oils and wax residue from its inability to remove the complete ceramic layer by itself (staged removal and panel-prep guidance).
Polish and compound
For conventional glossy paint, abrasive polishing is the most consistently supported way to remove cured coating. The abrasive and pad mechanically remove the surface layer, potentially including some clear coat beneath it.
There is no universal pad, polish, machine speed, pressure, or pass count. A weathered or lightly bonded coating may respond to finishing polish. A newer, more durable, or multilayer coating may require corrective polish or compound. The result depends on:
- Coating formula, age, and cure state
- Number and type of coating layers
- Paint hardness and existing damage
- Pad material and cutting ability
- Abrasive product
- Machine and backing-plate size
- Operator technique
- Whether the goal is coating removal alone or broader paint correction
Begin with a test spot and increase correction only when inspection shows that the lighter process was inadequate.
Chemical coating removers
Some manufacturers sell or discuss dedicated coating strippers. Such products may work within particular systems, but the supplied evidence does not establish one chemical as safe and effective across every coating, paint, plastic, rubber, glass, or trim surface.
Use a chemical remover only when its manufacturer expressly approves it for the coating and substrate involved. Follow the specified dilution, dwell time, temperature, rinsing, ventilation, and personal-protection directions. Test an inconspicuous area first. Do not substitute uncontrolled degreasers, solvents, or all-purpose cleaners.
Wet sanding
Wet sanding is not the ordinary next step when a light polish fails. It removes material rapidly, creates sanding marks that must later be refined, and can damage or compromise clear coat when technique or film thickness is uncertain.
Ceramic Pro publishes a manufacturer-specific body-shop procedure involving sanding through its coating and into the clear coat before paint blending (Ceramic Pro’s body-shop removal instructions). That is a specialized procedure for a particular professional coating and bodywork scenario—not a general recommendation for consumer coatings, routine removal, or isolated high spots.
If sanding appears necessary, stop and consult an experienced paint-correction professional or body shop.
Tools, Workspace, and Paint Preparation
Gather the equipment before washing so that you do not need to improvise midway through the job.
Basic checklist
- Automotive shampoo or appropriate stripping wash
- Two wash buckets, preferably with dirt-control inserts
- Clean wash mitts or dedicated wash media
- Microfiber drying towels
- Multiple clean residue-removal towels
- Contaminant-specific chemical decontamination products
- Clay bar, towel, or mitt with ample lubricant, if needed
- Automotive masking tape
- Strong, movable inspection lighting
- Compatible panel-preparation product
- Light or finishing polish
- More corrective polish or compound, held in reserve
- Suitable conservative polishing pads
- Dual-action polisher for larger areas
- Hand applicators or a smaller machine setup for tight areas
- Gloves and eye protection where product directions require them
A dual-action polisher is generally the practical choice for consistent full-panel or full-vehicle work. It does not make polishing risk-free. Excess pressure, unsuitable pads, poor technique, or repeated correction can produce haze or clear-coat damage, so the working method must be established through a test spot (paint-preparation and polishing-risk guidance).
Hand polishing can work on a small high spot, tight curve, or area around a badge. A smaller backing plate may also improve access.
Prepare and inspect the paint
Wash the vehicle thoroughly, rinse it, and dry it before judging the coating. Loose grit must not reach the polishing stage. If using a pressure washer, select a suitable spray pattern and maintain an appropriate working distance; the Car Cleaning Zone spray-nozzle guide covers wash-stage technique.
After washing, check for bonded contamination. Use chemical decontamination only when the contaminant can be identified and the product is compatible with the surface. Clay only where needed, using clean media and generous lubrication.
Before machine polishing, mask:
- Textured plastic
- Rubber seals
- Badges and emblems
- Sharp panel edges
- Raised body lines
- Adjacent matte or satin components
- Soft or easily stained trim
Work on cool panels under strong lighting, with ventilation appropriate to the products being used. Follow each product’s instructions for gloves, eye protection, respiratory protection, temperature, and other environmental conditions.
Inspect the finish for repainting, sanding marks, existing haze, deep scratches, clear-coat failure, edge wear, or signs of previous heavy correction.
A paint-thickness gauge can add context when used by someone who understands the substrate, equipment limitations, panel history, and comparative readings.
If the paint is valuable, custom, repainted, visibly worn at edges, or of unknown history, seek professional assessment before abrasion begins.
Step by Step: Remove Ceramic Coating From Gloss Paint
This sequence separates cleaning, decontamination, coating removal, paint refinement, and final preparation.
1. Identify and document the problem
Determine what coating was used, if possible. Record its age, installation date, number of layers, maintenance products, and whether the problem appeared immediately or developed gradually.
Inspect under strong directional light and photograph or mark the affected areas. View the finish from several angles. Select a small, inconspicuous test area that represents the condition you need to correct; do not begin on a sharp edge or the most visible part of the hood.
2. Wash and dry the vehicle
Use clean wash media and an automotive shampoo or appropriate stripping wash. The purpose is to remove loose dirt, road film, maintenance products, and residue that could distort the diagnosis or contaminate a polishing pad.
Rinse thoroughly and dry with clean microfiber towels. A change in beading after washing does not prove the coating is gone because surfactants, minerals, toppers, oils, and contamination can all change water behavior.
3. Decontaminate only as needed
Inspect the cleaned test area. If iron fallout, tar, minerals, or another identifiable contaminant remains, use an appropriate chemical process according to its instructions. If bonded particles remain after chemical treatment, use lubricated clay carefully.
The goal is to expose the coating’s true condition—not grind contamination against the paint or treat clay as the coating remover. After decontamination, rinse or wipe the area as directed, dry it, and inspect again. If the defect disappears, further abrasion may not be needed.
4. Start with a conservative polishing test
Clean the test area and mask adjacent sensitive surfaces. Begin with a light or finishing polish and a conservative pad. Use a clean pad and work an area large enough to compare with untreated paint.
Do not copy an arbitrary speed, pressure, or pass count from another vehicle. Observe how the abrasive behaves on this paint. Keep the pad controlled and reasonably flat, avoid lingering on edges, and stop periodically to inspect.
The first test does not need to remove every scratch. It should answer a narrower question: does this combination remove or sufficiently level the unwanted coating while leaving a finish that can be refined safely?
5. Remove residue and compare
Wipe away polishing residue with a clean towel. Use a compatible panel-preparation product as directed to remove oils that could conceal haze or alter water behavior.
Inspect the test spot from several angles and compare it with an adjacent untreated area. Check for:
- Removal or reduction of the original defect
- A uniform transition at the test boundary
- Haze, micro-marring, or pad marks
- Residual streaking that may still be coating
- Apparent paint transfer inconsistent with the known color of the pad, polish, or coating residue
- Unusual heat buildup
- Changes around edges and body lines
If you cannot identify residue appearing on the pad or towel, stop rather than assuming it is harmless.
6. Escalate only after reassessment
If the coating or defect remains, do not jump directly from a failed wash or light polish to aggressive compounding. Check whether contamination, a clogged pad, insufficient working time, an unsuitable pad choice, or a mistaken diagnosis caused the poor result.
If the paint appears sound and greater correction is justified, test a more corrective polish or pad combination in the same controlled area. Use compound only when a lighter process has proved inadequate.
Stop if a corrective test still cannot produce a safe, uniform result. The coating may be unusually durable or multilayered, or the visible defect may extend beneath the coating.
7. Record the successful combination
Once the test creates an acceptable result, record:
- Pad type
- Polish or compound
- Machine and backing-plate size
- Approximate working area
- Number of controlled polishing cycles
- Result after residue removal
- Panel-specific concerns
Use the least aggressive successful combination only across the area requiring correction. Do not automatically polish the entire vehicle because one localized defect needed treatment.
8. Protect edges and monitor the work
Inspect frequently as work continues. Clean or replace pads before residue and removed material accumulate. Keep masking intact around trim, edges, badges, and textured surfaces.
Stop for rapid heat buildup, persistent haze, apparent substrate paint transfer, edge damage, clear-coat instability, or results that differ substantially from the test spot. Panels may have different repair histories, so a method that works on one panel may be too aggressive on another.
9. Refine the finish
Coating removal and final paint finishing are not necessarily the same operation. A combination capable of removing a durable coating may leave haze or micro-marring. Refine the surface with an appropriate finishing step before applying new protection.
The objective is not theoretical removal of every microscopic trace. It is the minimum correction needed to create a visually uniform surface suitable for the next intended operation. No single process can be promised to work across every coating formula, cure state, layer structure, paint system, or vehicle history.
How to Correct Fresh and Cured High Spots
High-spot correction is a localized repair, not automatically a reason to strip an intact coating from an entire panel or vehicle.
Fresh high spots
If the coating has just been applied, consult its instructions immediately. The proper response depends on that product’s working and leveling window. Manufacturer guidance indicates that some high spots caught early can be gently leveled with a clean microfiber towel, while cured defects require localized polishing and recoating (R1 Coatings’ high-spot guidance).
Cured high spots
For a fully cured spot:
- Wash and dry the area.
- Remove genuine contamination if present.
- Inspect from multiple angles under strong light.
- Mask nearby trim, badges, edges, and body lines.
- Test a light polish locally.
- Remove residue and inspect the result.
- Escalate locally only if the light test was insufficient.
- Refine any haze or marring.
- Clean the corrected area with the approved panel-preparation product.
- Reapply the original coating if its repair instructions require it.
A microfiber towel alone may not remove a cured defect. Prefer a body-shop-safe polish or compound over cleaner-wax when recoating is planned, because cleaner-wax can leave wax or sealant residue that complicates preparation.
Localized correction can preserve more clear coat than polishing the whole vehicle. A complete panel may nevertheless produce a more uniform repair when the defect is large, surrounding protection is inconsistent, or a localized correction cannot be blended convincingly.
An invisible transition cannot be guaranteed. Coating age, wear, layer count, surrounding gloss, preparation, and application technique can all affect how a repaired area blends.
How to Check Whether the Coating Is Gone
No supplied source establishes a universal field test that proves every trace of every ceramic coating has been removed. Water behavior is useful evidence, but it is not conclusive.
Use a combined assessment:
- Remove polishing oils with a compatible panel-preparation product.
- Inspect under strong directional light.
- Compare the corrected test spot with untreated paint.
- Assess gloss, clarity, color, texture, and visual uniformity.
- Look for remaining streaks, high spots, haze, or marring.
- Observe water behavior only after the area is clean and residue-free.
- Decide whether the surface satisfies the requirements of the next operation.
Strong continued beading may suggest that coating remains. Reduced repellency, slower water evacuation, or broad pooling may suggest removal. Neither reaction proves the conclusion because contamination, surfactants, wax, toppers, polishing oils, and uneven coating wear can change water behavior. Forum guidance likewise treats an oil-removal wipe followed by water observation as an indicator rather than a standardized proof test (coating-removal verification discussion).
A squeaky feel or perceived color change should be treated only as an anecdotal clue. Chasing a color change with additional polishing is especially unwise because the change may reflect paint correction or excessive abrasion rather than coating removal.
When one indicator is ambiguous, clean and inspect again before adding more abrasion. Compare the area with both untreated paint and the successful test spot. For recoating, the practical target is a clean, dry, visually uniform surface that satisfies the new product’s preparation instructions—not a claim of microscopic certainty.
For repainting, bodywork, or warranty-sensitive recoating, allow the body shop, installer, or coating manufacturer to define the required preparation standard.
Stop rule: If visible defects remain but you cannot determine whether they are coating, paint damage, sanding marks, or polishing haze, stop and seek experienced assessment.
Surfaces and Situations That Need a Different Approach
Do not transfer the gloss-paint process indiscriminately to every vehicle surface.
| Surface or situation | Appropriate starting point | Main risk or stop condition |
|---|---|---|
| Gloss factory paint | Wash, decontaminate as needed, test a light polish, then escalate cautiously | Clear-coat loss, haze, heat, or edge damage |
| Matte or satin paint | Use finish-approved cleaners and consult the manufacturer or specialist | Abrasion can create glossy or uneven patches |
| Repainted panels | Confirm repair history before aggressive work | Unknown film build, cure, hardness, or previous correction |
| Automotive glass | Begin with normal glass cleaning and careful decontamination | Scratching, haze, or an optically uneven result |
| Textured trim | Mask and avoid ordinary paint-polishing procedures | Staining, trapped residue, or texture alteration |
| Panel edges and body lines | Minimize direct machine exposure | Concentrated abrasion on vulnerable areas |
| Professional multilayer system | Contact the original installer or manufacturer | Layer-specific repair needs and warranty consequences |
Matte and satin paint
Do not use ordinary gloss-paint polishing or sanding methods on matte or satin finishes. Abrasion can alter the surface texture and create glossy, uneven areas that cannot simply be polished back to their original appearance.
Use products expressly approved for the finish. If cleaning does not resolve the defect, consult the vehicle, paint, or coating manufacturer.
Repainted, custom, or uncertain paint
Valuable vehicles, custom finishes, visible edge wear, and thin or unknown clear coat warrant professional evaluation before abrasive removal.
A thickness reading may help an experienced operator compare panels, but it does not create a universal safety threshold. Do not use an isolated reading as automatic permission to compound.
Automotive glass
Treat coated glass as a separate job. Start with ordinary automotive glass cleaning, followed by careful surface-appropriate decontamination if minerals or bonded residue remain.
Do not transfer paint compounds, pads, machine settings, or verification methods directly to glass. The supplied evidence does not establish steel wool, uncontrolled all-purpose-cleaner dwell, or paint compound as universal glass-coating removers. Forum participants who discuss glass correction also caution that polishing it is easy to mishandle and requires careful technique (glass-removal discussion).
If normal cleaning and decontamination do not resolve the issue, consult an experienced automotive-glass or detailing professional.
Tight areas and edges
Hand polishing or a smaller backing plate can help around badges, mirrors, pillars, curves, and narrow sections. Use minimal product, protect adjacent materials, and inspect frequently. These areas are easy to overwork and difficult to blend evenly.
Be especially conservative at sharp edges and raised body lines, where pad contact and pressure can become concentrated.
Professional and multilayer systems
Professional, unusually durable, warrantied, or multilayer systems may not behave like consumer coatings. Contact the original installer before escalating. The installer may know the layer structure, approved repair process, warranty terms, and whether only a top layer or the complete system must be removed.
Do not automatically chase scratches beneath the coating. If removing the coating exposes a deeper defect, further correction may require more clear-coat removal than the finish can tolerate.
If the job appears to require sanding, bodywork, or correction of a defect below the coating, stop. Sanding should remain an exceptional professional procedure rather than a routine continuation of DIY polishing.
After Removal: Refinement, Panel Prep, and New Protection
Once the coating has been removed to the standard required for the next operation, assess the paint independently of the removal stage.
Refine haze and marring
Corrective polish or compound may leave haze, pad marks, or micro-marring. Refine those defects with a suitable finishing combination before applying protection.
Inspect every corrected panel under strong directional light, from several angles and, where practical, under more than one lighting condition. The paint should appear consistently clear and uniform.
Remove polishing oils
Use a compatible panel-preparation product according to its instructions. This removes polishing oils and residue so the actual finish can be inspected and prepared for protection. It is not what removed the cured coating; mechanical polishing performed that work.
Use clean towels and turn them frequently. If residue smears rather than lifting cleanly, change towels and reassess the product quantity instead of scrubbing harder.
Apply the next protection correctly
When installing another ceramic coating, follow that product’s preparation, temperature, humidity, application, leveling, and curing directions. Do not assume the previous coating’s instructions apply to its replacement.
For a corrected high spot, use the original coating and documented repair method when available. If the coating cannot be identified, contact the installer rather than guessing at compatibility.
If the paint will not be recoated promptly, apply a compatible wax or sealant after polishing residue has been removed. This provides temporary protection for the exposed finish.
Avoid these shortcuts
Do not use:
- Steel wool
- Abrasive household scrubbers
- Dirty or dropped microfiber towels
- Dish soap treated as a guaranteed coating remover
- Uncontrolled degreasers or solvents
- Cleaner-wax immediately before recoating
- Dry clay or inadequate clay lubricant
- Repeated aggressive compounding without inspection
- Paint-polishing methods copied directly onto glass
- Sandpaper as the next DIY step after an unsuccessful polish
Commercial removal guidance warns that unsuitable chemicals, abrasive scrubbers, dirty towels, and excessive polishing can mar or damage the finish (Feynlab’s removal-risk overview).
Know when to stop
Stop the DIY process if you encounter:
- Apparent paint transfer that does not match the known color of the polish, coating residue, or pad
- Rapid or difficult-to-control heat buildup
- Persistent haze that refinement does not resolve
- Edge damage or visibly thinning paint
- Clear-coat checking, lifting, failure, or instability
- Uncertainty about paint thickness or repair history
- An unidentified coating that resists conservative correction
- A warrantied multilayer installation
- Matte or satin paint requiring abrasion
- A need for wet sanding
- Defects that may be beneath the coating and too deep to remove safely
There is no reliable fixed timeframe for ceramic coating removal. A localized high spot and a full multilayer removal are fundamentally different jobs. Vehicle size, coating formula, age, layer count, contamination, paint condition, access around trim, and required refinement can all change the scope.
Frequently Asked Questions
Can ceramic coating be removed without polishing?
Sometimes washing, chemical decontamination, or clay will remove contamination and maintenance products sitting on top of a coating. Those steps may restore the finish well enough that removal is unnecessary.
They should not be expected to remove every fully cured coating. When the bonded coating itself must be stripped from gloss paint, controlled abrasive polishing is the most consistently supported method. A fresh high spot caught within its manufacturer’s working window is the main exception.
Will isopropyl alcohol or panel prep remove ceramic coating?
Not reliably. IPA and panel-preparation products primarily remove oils, wax residue, fingerprints, and polishing residue. They help reveal the true finish and prepare it for protection, but they should not be treated as the primary remover of cured coating.
Use a compatible product at the dilution and on the substrates specified by its manufacturer.
Does a clay bar remove ceramic coating?
Clay can remove bonded contamination and may lift loose or deteriorated residue. It is not a dependable standalone remover for an intact cured coating.
Because clay can mar paint, use it only after washing, with ample lubricant, and only where bonded contamination remains. If the bonded coating must be removed, a controlled polishing test is more appropriate than repeated aggressive claying.
Can ceramic coating be removed by hand, or is a dual-action polisher necessary?
A small high spot, narrow curve, or area around a badge may sometimes be corrected by hand. Hand polishing is most practical when the work is genuinely localized and can be inspected frequently.
A dual-action polisher is generally more efficient and consistent for complete panels or vehicles. Neither approach is risk-free: hand pressure can be uneven, while machine polishing can create haze, heat, or edge damage. Begin with a small test area either way.
How long does it take to remove ceramic coating from a car?
There is no dependable universal timeframe. The job may involve one high spot, one panel, or a complete multilayer system. Coating durability, cure state, paint condition, contamination, access, and the amount of finishing required all affect the schedule.
Allow enough time to wash, diagnose, test, inspect, refine, and stop safely if the coating or paint behaves differently than expected.
Final decision framework: Clean and diagnose before abrading. Correct only the area that genuinely needs correction. On glossy paint, test a light polish and escalate only when inspection justifies it. Stop before sanding, polishing matte paint, or taking risks with uncertain clear coat. Once the finish is uniform, refine it, remove polishing residue, and either apply the replacement coating according to its instructions or add compatible temporary protection.