
A Least-Aggressive-First Method for Removing Tree Sap
Wash away grit, soften sap with a warm damp microfiber towel, then use a surface-labeled remover; stop if only a flat dull mark remains.
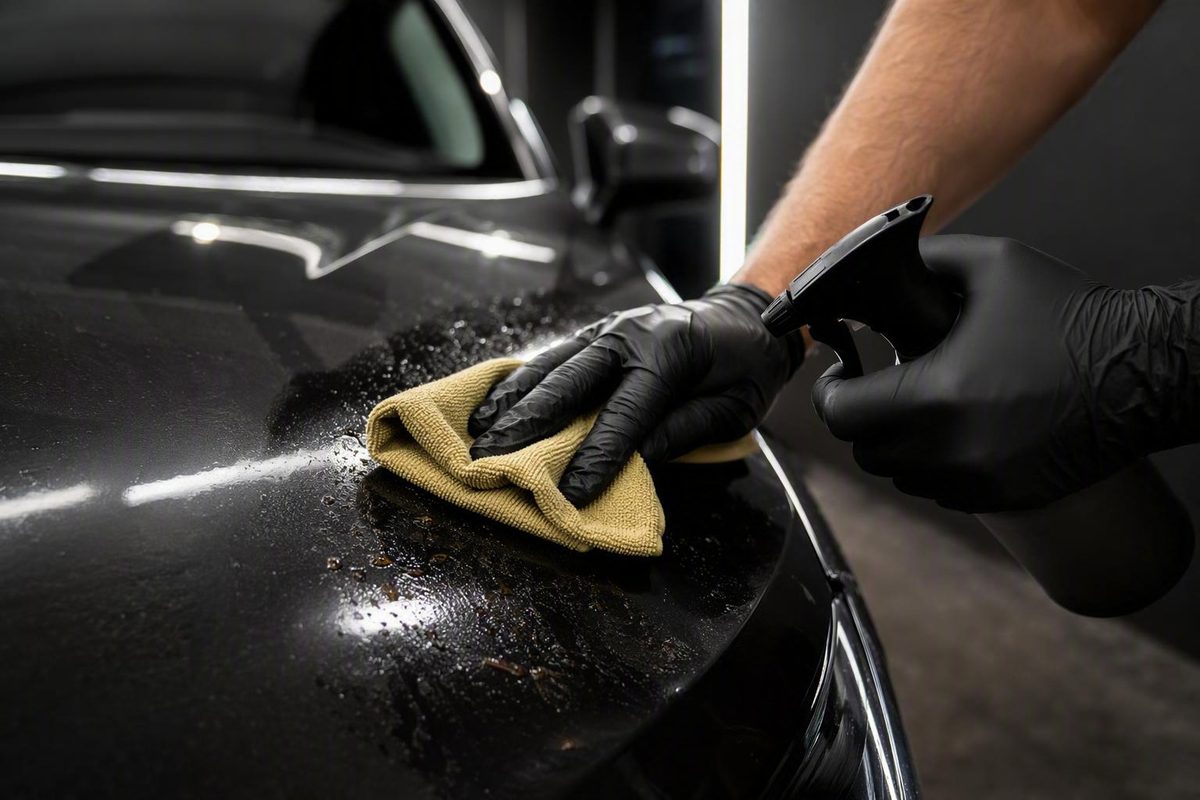
To take sap off a car without creating unnecessary paint risk, work on a cool, clean panel and escalate gradually. Wash away loose grit, soften the deposit with a warm damp microfiber towel, and gently lift it. If sap remains, use a cleaner specifically labeled for the affected automotive surface. Rewash, dry, inspect, and restore compatible wax or sealant.
If the raised deposit is gone but a flat dull mark remains, stop applying solvent. The remaining mark may be staining or finish damage that needs polishing or professional correction.
The short answer: wash, soften, lift, and protect
Fresh sap is generally easier to remove than a hardened deposit, so address it promptly. Gather:
- Car-safe wash soap
- Clean water
- Several clean microfiber towels
- A sap remover or bug-and-tar remover labeled for the affected surface
- Compatible wax or sealant
- Any gloves or protective equipment required by the cleaner’s label
Then use this sequence:
- Park in the shade and let the panel cool. This helps keep water and cleaner from drying prematurely.
- Wash the affected area. Removing dust and grit first reduces the chance of dragging loose contamination across the finish.
- Soften the sap. Hold a warm, damp microfiber towel against the deposit instead of immediately rubbing it.
- Lift gently. Dab, roll, or wipe with minimal pressure, switching to a clean section of towel as it picks up sap.
- Use a compatible remover if necessary. Follow the label for surface compatibility, application, dwell time, protective equipment, and cleanup. Do not let the product dry on the panel.
- Rinse or rewash. Remove the dissolved sap and cleaner residue.
- Dry and inspect. Determine whether anything remains raised or whether the level surface has a stain, haze, scratch, or dull ring.
- Restore protection. Reapply compatible wax or sealant if the treatment may have weakened the existing protection.
Washing before treatment and allowing a remover-dampened cloth to sit briefly on the deposit are also part of the procedure described by Cars.com.
This is a cautious synthesis of automotive product and detailing guidance, not proof that one remover or method is universally best. Paint condition, previous repairs, coatings, wraps, trim, and product formulas can all change what is compatible.
Choose the method by what the sap looks and feels like
First determine whether the spot is removable contamination or a mark left after the contamination has gone.
| What you see or feel | Likely condition | Best next step |
|---|---|---|
| Soft, sticky, or tacky spot | Fresh sap | Wash, soften with a warm damp microfiber, and lift gently before using a remover |
| Hard, raised bead | Hardened sap | Use a labeled automotive sap or bug-and-tar remover in repeated brief treatments; do not scrape |
| Flat dull ring or discoloration | Possible staining or finish damage | Stop using solvent and consider polishing or professional assessment |
| Sap on matte paint, wrap, PPF, coating, or questionable paint | Specialty or vulnerable finish | Follow the vehicle, product, coating, or installer’s care instructions |
The key distinction is raised versus flat. If you can still feel a bead above the panel, contamination remains. If the panel feels level but looks dull or discolored, more remover may not address the problem.
Do not assume that a procedure suitable for factory gloss paint also suits matte paint, vinyl wraps, paint-protection film, ceramic coatings, repainted panels, plastic trim, rubber, or aging clear coat. Check the applicable vehicle, finish, coating, or installer instructions before proceeding.
How to remove fresh sap step by step
Fresh, still-soft sap often requires less chemical and mechanical action than a baked-on bead.
-
Move the car into shade. Wait until the panel is cool to the touch. Do not start if the surface will dry wash water or cleaner before you can remove it.
-
Wash the panel. Use car-safe wash soap, clean water, and a clean wash medium. Rinse thoroughly so grit is not trapped beneath the towel during spot treatment.
-
Apply a warm compress. Soak a clean microfiber towel in warm water, wring it until damp, and hold it against the sap. Let warmth and moisture soften the deposit.
-
Try lifting the spot. Roll the towel away or wipe lightly. Do not dig at the edge with your fingernail.
-
Patch-test a compatible cleaner. If residue remains, select a product whose label permits use on the affected surface. Test it in a suitable hidden area first, particularly when dealing with an unfamiliar cleaner or uncertain finish. Product-maker guidance likewise recommends spot-testing when compatibility is uncertain (see the surface precautions).
-
Allow a brief, label-compliant dwell. Dampen a fresh microfiber towel with the cleaner and hold it against the sap for roughly 30–60 seconds, unless the product label specifies another method or dwell time. A detailing guide describes this range while emphasizing gentle lifting rather than scrubbing (review the 30–60-second procedure).
-
Lift with minimal pressure. Dab, roll, or use short light wipes. Move to a clean section of towel as soon as the working section becomes sticky or dirty.
-
Repeat only while it is helping. Brief, label-compliant applications can be repeated when each one produces visible improvement. Do not compensate for slow progress by scrubbing harder or exceeding the labeled dwell time.
-
Rinse or wash the area again. Remove all cleaner and dissolved residue once the sap has lifted.
If several gentle attempts produce no change, stop. The deposit may require a different compatible product, may be too hardened for safe DIY removal, or may already be gone while leaving a visible finish defect.
How to handle hardened sap without scraping the paint
For a dry, raised bead, begin with a dedicated automotive sap remover or bug-and-tar remover labeled for the affected surface. Apply it through a clean microfiber towel if directed, observe the product’s dwell time, and use repeated brief treatments rather than trying to catch and peel an edge.
Do not use a razor blade, plastic blade, fingernail, stiff brush, scouring pad, or abrasive pad on painted surfaces. Concentrated pressure, sharp edges, or trapped grit can damage the finish. A documented detailing job reports damage after the vehicle owner used a razor on hardened contamination (see the removal example).
If chemical treatment removes most of the material but leaves a clearly raised speck, fine detailing clay is a cautious escalation:
- Wash the area again.
- Apply generous clay lubricant.
- Use clean, fine-grade clay.
- Move it in light, straight, overlapping passes.
- Fold the clay frequently to expose a clean face.
- Add lubricant whenever the clay stops gliding freely.
- Discard the clay if it touches the ground.
- Stop as soon as the raised contamination is gone.
Clay is not guaranteed to be scratch-free. Commercial clay guidance acknowledges possible light marring while recommending fine clay, generous lubricant, frequent folding, and very light pressure (review the clay procedure).
Move to a professional detailer when the sap is rock-hard, widespread, baked on for an extended period, located on a delicate or uncertain finish, or unchanged after several gentle attempts. Aggressive rubbing or scraping can add scratches to the original problem.
Rubbing alcohol, household products, and tools to avoid
Rubbing alcohol appears in several sap-removal guides, but their concentration advice conflicts. Some recommend diluted isopropyl alcohol, while others name a particular off-the-shelf concentration. Those differing recommendations do not establish one formula as universally compatible with factory paint, repainted panels, wraps, film, coatings, trim, or weathered clear coat.
Use rubbing alcohol only when the applicable vehicle, paint, wrap, film, or coating instructions and the alcohol product’s directions permit it. Test a hidden area first, keep the application brief, prevent it from drying, and rewash afterward. Alcohol and dedicated sap removers may weaken or remove wax or sealant around the treated spot, so plan to restore compatible protection.
Do not treat the following household or garage chemicals as automatically safe for automotive paint:
- Acetone
- Paint thinner
- Straight nail-polish remover
- Mineral spirits
- Hand sanitizer
- Household degreaser
- Baking soda paste
Compatibility depends on the particular paint system, trim, coating, and existing protection. A purpose-labeled automotive sap or bug-and-tar remover offers clearer surface and application instructions than an improvised chemical.
Do not use on automotive paint: metal blades, plastic blades, fingernails, stiff brushes, scouring pads, abrasive pads, or aggressive pressure.
Treat glass as a different surface, but do not assume that makes scraping routine or risk-free. Loose grit may scratch, the glass may have an exterior coating, and aftermarket tint may be present on the interior surface. Begin with a glass-compatible cleaner and a non-scraping method. If contamination remains, follow the vehicle, glass, tint, or coating maker’s instructions.
Use one compatible product at a time and follow its label for application, ventilation, protective equipment, rinsing, storage, and disposal.
Inspect the finish, restore protection, and know when to stop
After removing the sap, thoroughly rinse or rewash the treated area and dry it with a clean microfiber towel. Inspect the panel from more than one angle under good lighting.
Ask two questions:
- Is anything still raised? If so, contamination may remain.
- Is the panel level but visibly altered? A flat stain, dull ring, haze, discoloration, or scratch points toward a finish problem rather than sap still sitting on top.
Do not continue trying to clean through a visible change in the finish.
When the deposit is gone but a flat mark remains, additional solvent is unlikely to be the appropriate next step. Light polishing may improve some marks, while suspected etching, clear-coat failure, or an uncertain repaint is better assessed by a reputable detailer or body shop. The correct response depends on the paint’s condition and the depth of the defect.
Once the panel is clean, dry, and visibly sound, reapply a compatible wax or sealant as appropriate. Restoring protection may make later maintenance easier, but wax, sealant, film, or coating does not guarantee that sap will never bond to or mark a vehicle.
Seek professional assessment for:
- Visible etching or persistent discoloration
- Haze that remains after cleaning
- Suspected clear-coat failure
- Rock-hard or widespread deposits
- Scratches caused by an earlier removal attempt
- Repainted panels or aging paint
- Matte finishes, wraps, PPF, or coatings without clear care instructions
- Paint-color transfer, softening, swelling, or another visible finish change
For prevention, avoid regularly parking beneath sap-producing trees when practical, inspect the vehicle after parking under trees, and remove new deposits promptly. Maintain compatible paint protection, but treat it as a maintenance aid rather than a guarantee.
The least-aggressive-first rule is straightforward: remove grit, soften the deposit, use only a surface-compatible cleaner, and rely on patience rather than pressure. Once the raised sap is gone, treat persistent staining, haze, or etching as a finish issue—not as a reason to keep applying solvent.