
Clean Headlights First—Restore Them Only If the Haze Remains
Wash dirty headlights safely, identify exterior oxidation or internal moisture, and restore yellow lenses without skipping UV protection.
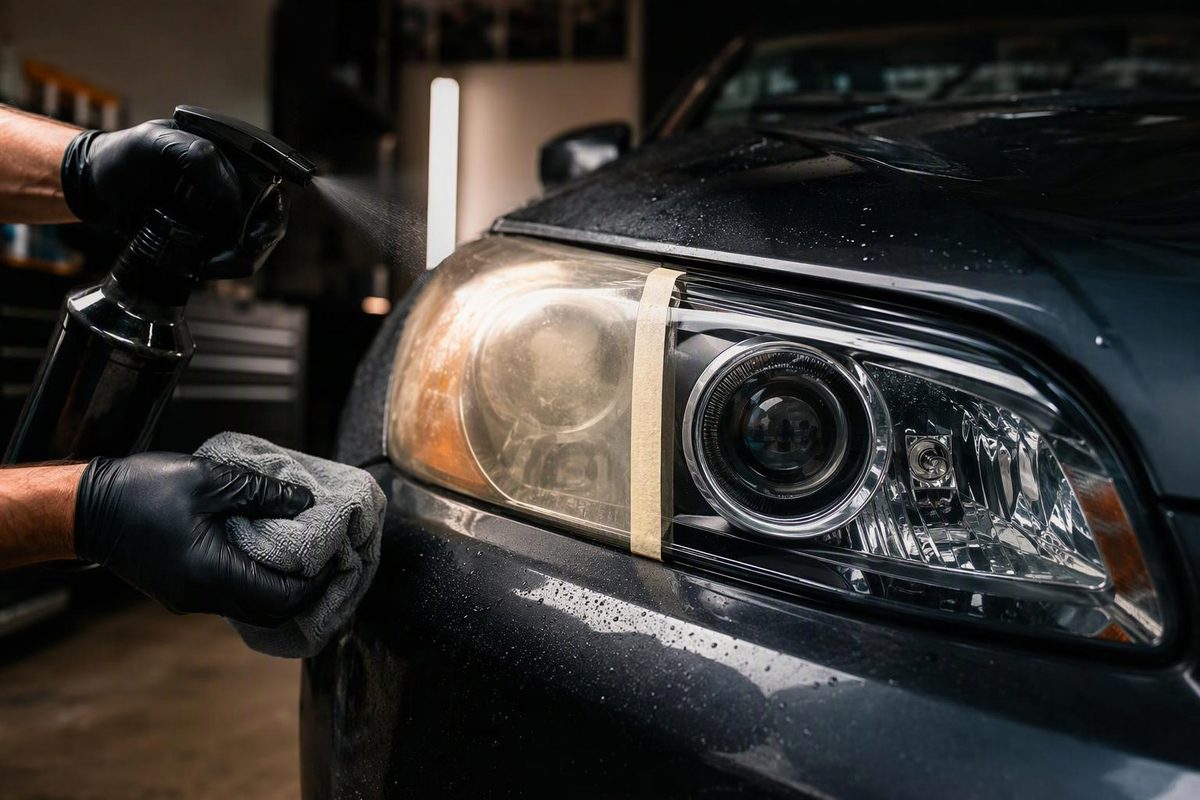
Start with an ordinary wash. If a clean lens still looks yellow, chalky or cloudy, it needs restoration rather than more cleaning. If the moisture is behind the lens, exterior cleaners cannot reach the problem.
First, identify what you are seeing
Inspect both headlights when they are cool and dry:
- Loose dirt, insects or road film: The mark changes or comes away when washed.
- Exterior oxidation: The dry lens remains evenly yellow or cloudy and may feel rough. The bulb can be difficult to see through it.
- Fine exterior scratches: Light catches lines in the surface, but the lens may not be yellow.
- Moisture inside: Mist, droplets or water trails sit behind the smooth outer surface.
- Damage: Cracks, peeling material, deep crazing or burned areas remain after cleaning.
AAA recommends restoration or replacement when yellowing or clouding makes the bulb difficult to see. It also advises checking headlight aim afterward (AAA Colorado).
For ordinary dirt: wash without grinding it into the lens
You need car-wash shampoo, clean water, a wash mitt or soft microfiber towel, and a separate drying towel.
- Work in shade on cool lenses. Rinse each headlight and its surrounding paint to remove loose grit.
- Mix shampoo at its label dilution. A stronger mix is not automatically safer or more effective.
- Wash gently. Pass the lubricated mitt or towel across the lens with light pressure. Do not scrub dried grit. Soften stubborn insect residue with the wet wash solution, then try again.
- Clean the edges. A soft, clean detailing brush can reach the seam around the housing, but do not force bristles into seals or vents. Keep brushes assigned by surface so wheel contamination does not reach the lens; see how to separate car-cleaning rags and choose detail brushes.
- Rinse thoroughly and dry. Use a clean microfiber towel rather than letting mineral-rich water evaporate on the lens.
- Inspect again when dry. A wet oxidized lens can look temporarily clear, so do not judge it until the water is gone.
Stop here if the lenses are clear. Abrasive polishing or sanding removes material and is unnecessary for ordinary grime.
If yellow haze remains: use a complete restoration system
Restoration is controlled surface removal followed by renewed UV protection—not simply a more aggressive wash. Sylvania’s restoration instructions describe removing damaged material and applying a new UV-protective layer. Its process progresses through wet sanding and polishing before coating (Sylvania restoration-kit instructions).
Choose a headlight-restoration kit that includes both abrasives and a lens-compatible UV coating. Then follow that kit’s grit sequence, application directions and cure time exactly; products are not interchangeable by assumption.
A typical workflow is:
- Wash and completely dry both lenses.
- Protect adjacent paint and trim as directed. Be cautious with tape over chipped, weathered or repaired paint because removal may lift a weak finish.
- If the kit calls for wet sanding, keep the lens and waterproof abrasive wet. Work the complete surface evenly rather than chasing one clear patch.
- Advance through every specified grit. Each finer stage must remove the previous stage’s sanding pattern.
- Rinse and dry to check the surface. During a full restoration, uniform white haze before coating may be intentional—not failure.
- Clean the prepared lens exactly as the kit requires. Residue, oils and moisture can interfere with coating adhesion.
- Apply the supplied UV protection in the stated pattern and allow the specified cure time before driving or exposing it to water.
For example, Sylvania specifies a clean, dry lens away from direct sun, wet sanding through its supplied 400-, 1000- and 2000-grit papers, then applying its UV clear coat. That particular coating requires at least one hour before touching and four to six hours for a full cure, with no driving or water exposure while it cures. Those figures apply to that product, not every kit.
Skip toothpaste, insect repellent and unverified solvent mixtures. They do not provide the documented abrasive progression and replacement UV layer of a complete restoration process, and an incompatible chemical can affect the lens or surrounding finish.
If fog or water is inside the headlight
Do not sand the outside to treat internal moisture. A light film can be condensation in a vented lamp, while large droplets, trails or pooled water can indicate a damaged seal, cover or housing.
A 2025 Bentley service bulletin illustrates the distinction: minor internal misting can result from humid air and temperature differences, whereas extensive droplets can indicate water ingress. For the vehicles covered by that bulletin, the light-emitting area should clear after driving with the dipped beams on and adequate airflow; persistent large droplets trigger checks of covers, seals, vents and cracks (NHTSA-hosted Bentley bulletin). Procedures vary by vehicle, so use the owner’s manual or model-specific service information rather than treating that test as universal.
Arrange inspection if there is standing water, corrosion, recurring heavy droplets, a crack, or condensation that does not clear as your manufacturer describes. Replacement may be the better option when the lens is deeply crazed, the housing leaks, mounting points are broken, or restoration would not leave a sound optical surface. After restoration or replacement, check both low- and high-beam operation and have the aim corrected if the beam pattern is wrong.