
Choose the Right Automotive Sandpaper Without Cutting Too Deep
Cured primer commonly takes P400–P600 before base coat; the chart also separates stripping, filler, blend panels and clear-coat correction.
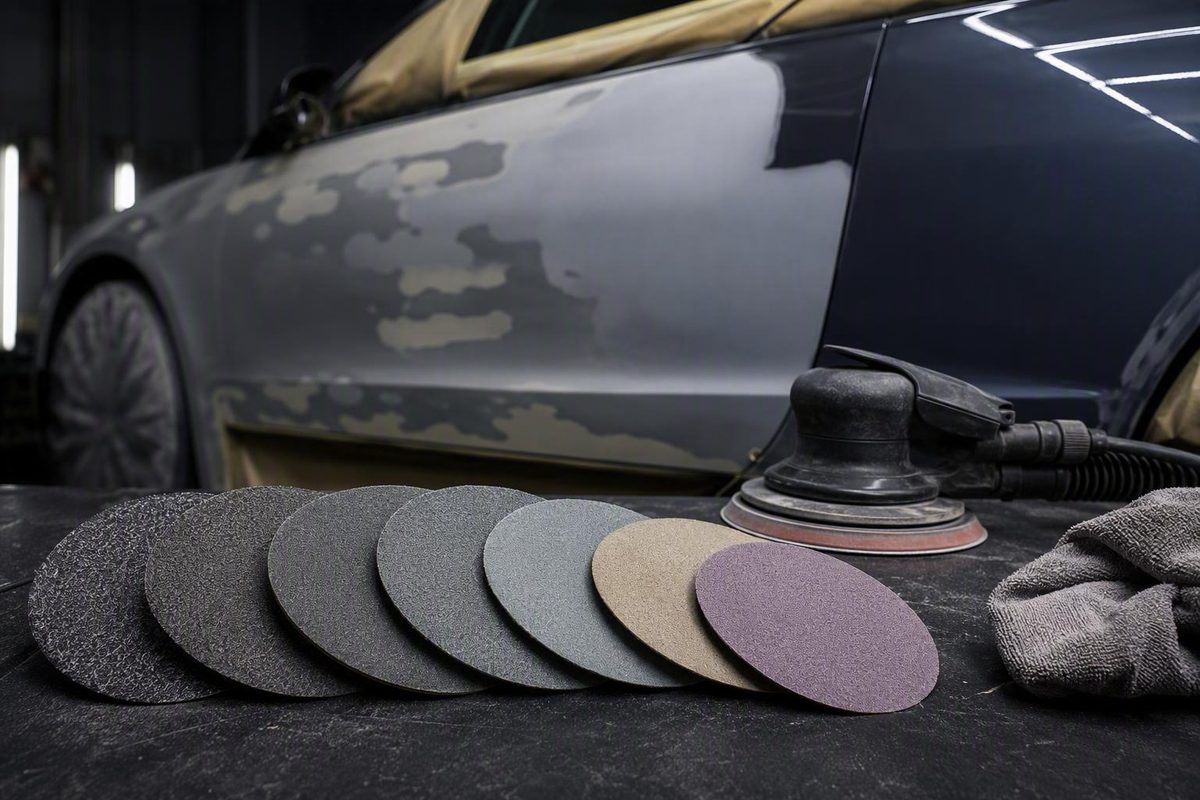
There is no single correct answer to what grit sandpaper to use on car paint. These ranges are a synthesis of common refinishing recommendations, not universal specifications. Colours’ refinishing guide shows the same progression from coarse bodywork abrasives to fine clear-coat finishing grades.
The technical data sheets for the specific primer, base coat, clear coat, and abrasive—and any applicable OEM repair procedure—take priority over a general chart.
Quick answer: match the grit to the job
Lower grit numbers are coarser, cut faster, and leave deeper scratches. Higher numbers remove less material and leave a finer scratch pattern. The goal is not to choose the finest paper available. It is to use the least aggressive grade that will complete the present task while leaving a suitable surface for whatever comes next.
| Current surface or task | Typical grit range | Usual method | Purpose, next step, and main risk |
|---|---|---|---|
| Heavy buildup, rust, or deliberate stripping | About 36–80 | Usually dry | Removes coatings or corrosion before scratch refinement and primer preparation. Main risk: gouging metal or leaving deep scratches. |
| Rough body filler | About 80–180 | Usually dry, often with a block | Shapes the repair before finer blocking. Main risk: waves, low spots, or coarse scratches. |
| Final filler and feather-edge | About 120–240 | Usually dry | Smooths filler and blends repair edges before final primer preparation. Main risk: visible transitions or remaining coarse scratches. |
| Substrate before primer | About 220–400 | Usually dry; system dependent | Establishes the primer-ready scratch profile. Main risk: poor preparation or scratches too coarse for the primer. |
| Cured primer before base coat | About 400–600 | Wet or dry as specified | Flattens primer and prepares it for color. Main risk: scratches visible through the finish. |
| Sound paint or blend panel | About 800–1000 or finer | Fine dry or wet sanding as specified | Prepares an existing finish for repainting or blending. Main risk: an uneven pattern showing through metallic or pearl paint. |
| Cured clear-coat correction | About 1500–3000 or finer | Usually wet | Levels defects before compounding and polishing. Main risk: sanding through the clear coat. |
These ranges vary by repair procedure. For example, 3M’s refinishing guidance places filler shaping around 80–180, final filler work around 220–240, primer preparation around 320–400, and many blend-panel procedures around 800–1000 or finer, while directing technicians to check the paint maker’s requirements. See 3M’s stage-specific abrasive guidance.
Warning: 36–80 grit is highly aggressive. Do not use it on intact finished paint unless deliberate coating removal is the objective. It cuts quickly and can leave deep scratches that require several refining stages.
First identify what you are actually sanding
Before selecting an abrasive, identify the surface beneath it and the material that will be applied afterward.
- Bare metal, rust, or unwanted paint: You are intentionally removing material. Coarse paper may be justified, but its scratches must be refined before primer.
- Body filler: You are shaping a repair. A suitable sanding block helps preserve the intended contour instead of following every dip in the filler.
- Primer: You are flattening the repair and creating the scratch profile required for the next coating.
- Sound existing paint: You are normally preparing for adhesion, repainting, or blending—not stripping the panel.
- Cured clear coat: You are leveling defects before compound and polish. This calls for much finer abrasives and restrained material removal.
These jobs cannot share one default grit. An abrasive that efficiently shapes filler can rapidly damage a sound clear-coated panel. Conversely, a finishing abrasive suitable for cured clear coat would be inefficient for leveling rough filler.
Published pre-paint recommendations vary because coating systems do not all accept the same scratch profile. The proper endpoint may also change with hand versus machine sanding, wet versus dry use, repair size, abrasive construction, and metallic or pearl blend requirements. Use the instructions for the exact product rather than those for a similarly named primer or paint.
Paint construction matters as well. On a base-coat/clear-coat finish, correction sanding works on the transparent clear layer above the color. On single-stage paint, the color and protective coating are combined, so sanding removes pigmented material rather than a separate clear layer. That calls for conservative grit selection, light pressure, and frequent inspection.
Example grit progressions for common repair jobs
A progression works because each abrasive removes the scratch pattern left by the previous grade. Jumping directly from a coarse grit to a very fine one may smooth the tops of deep scratches without reaching their full depth. Those marks can remain visible after primer or paint.
Dent-and-filler repair
- Remove paint only as far as the approved repair procedure requires.
- Shape the filler at approximately P80 with a suitable block.
- Perform final blocking at approximately P150.
- Feather-edge the surrounding repair at approximately P180.
- Refine the area until it meets the primer maker’s permitted scratch profile.
- Apply guide coat and inspect the surface before priming.
The P80-to-P150-to-P180 sequence comes from a 3M professional collision-repair procedure. It is a useful worked example, but the document concerns particular repair processes rather than every passenger-car job. The 3M procedure documents the filler-blocking and feather-edge sequence.
Do not rely on primer to conceal coarse scratches. Before spraying, remove scratches from earlier P80- or P180-level work through appropriate intermediate grades. Guide coat can reveal residual scratches as well as high and low areas that need more blocking.
Primer to base coat
Prepare the substrate within the primer maker’s permitted range, apply the specified film build, and allow the primer to cure as directed. Cured primer is commonly sanded around P400–P600 before base coat, but the exact endpoint depends on the coating, color, abrasive, tool, and wet-or-dry method.
If guide coat remains in low spots, continuing with fine paper will not make the panel flat. Correct the low area or repeat the appropriate blocking stage rather than thinning the surrounding primer unnecessarily.
Sound paint or blend panel
When the existing coating is sound, preparation may finish around P800–P1000 or finer if the paint-system instructions permit it. The repair and blend ranges, as well as the requirement to remove coarse scratches before primer, are reflected in 3M’s refinishing recommendations.
Prepare the intended blend area uniformly.
Wet sanding cured clear coat requires a different approach
Wet sanding clear coat is a cured-paint correction process for defects such as orange peel, dust nibs, runs, and uneven texture. It is not the same workflow as stripping paint, shaping filler, or preparing primer.
Start with the finest grit capable of correcting the defect. Typical starting points include:
- Light imperfections: approximately P2000
- Moderate texture: approximately P1500
- Substantial defects: approximately P1000–P1200, but only when the coating is fully cured and the usable clear-coat build is known
A common refinement path is P1500, then P2000, then P3000, followed by compounding and polishing. The starting point and number of stages must be adjusted to the defect and paint system. Water, light pressure, a suitable block, and frequent inspection reduce the chance of uncontrolled cutting. This cured-paint guide describes the defect-based starting points and progressive refinement process.
P800 starting methods do exist, but they belong to specialist workflows involving substantial, fully cured clear coat and an operator prepared to remove every resulting scratch. One documented show-car process used P800, P1000, P1200, P1500, P2000, and P3000 on a particular custom paint system. That does not establish P800 as safe for factory, aged, thin, previously polished, single-stage, or otherwise unknown paint. Old Cars Weekly documents the specific paint system and complete specialist progression.
A correctly wet-sanded area looks flat and hazy rather than glossy. Compounding removes the fine sanding marks, while polishing refines the finish and restores gloss. Neither step can replace coating that has been removed.
Control the scratch pattern, not just the grit number
Successful sanding is defined by a consistent, fully refined scratch pattern—not merely the number printed on the abrasive.
Clean the panel before starting and between every grit. A hard particle trapped under a block or disc can produce a scratch much deeper than the surrounding pattern. Remove residue as appropriate, keep wet-sanding water clean, and replace abrasives that are clogged, contaminated, worn, or no longer cutting evenly.
Use guide coat during relevant dry-sanding stages. Sand until the previous scratch pattern and guide coat have been removed uniformly, then inspect under clear lighting before moving to a finer grade. Changing sanding direction between hand-sanding stages can make residual scratches easier to identify.
Pigtails and isolated deep marks are associated with contaminated or loaded abrasives, excessive or uneven pressure, worn discs, inconsistent movement, and grit jumps that are too large. Dust extraction can also make the scratch pattern easier to inspect and reduce abrasive loading. 3M’s abrasive guidance discusses these defects and their common causes.
Use light, even pressure and let the abrasive do the cutting.
Curves, wheel arches, sharp edges, creases, and raised body lines need extra care because coating can be removed from them quickly. These areas may require careful hand sanding with an appropriately shaped block or interface. Do not continue sanding an edge simply to make its haze match the center of the panel.
Water can lubricate fine sanding, carry away residue, and reduce clogging. That is why wet sanding is common in paint and clear-coat finishing. It is not automatically suitable for filler, bare metal, every primer, or every abrasive; use the wet-or-dry method specified for the material involved.
Know when not to sand
Do not attempt aggressive clear-coat leveling when the remaining coating thickness is unknown, particularly on factory paint that may previously have been sanded, compounded, polished, or repaired. Edges and body lines are especially vulnerable, and sanding through clear into base coat or primer requires refinishing rather than additional polishing.
Stop and obtain paint-system guidance or a professional assessment when you encounter:
- Peeling, chalking, or otherwise failing clear coat
- Fresh paint without confirmed sanding and cure requirements
- Unknown paint construction or repair history
- Metallic or pearl blending beyond your experience
- Runs or texture that would require a coarse starting grit
- Defects beside sharp edges, creases, or raised body lines
- Signs that sanding has exposed color or primer
- A correction that would require aggressive leveling without a reliable coating assessment
Fresh coatings do not share one universal cure interval. Use the technical data sheet for the exact primer, base coat, or clear coat to determine when sanding is permitted, whether the process should be wet or dry, and which final grit is acceptable. Consult applicable OEM repair information when substrate, corrosion protection, coating restrictions, or panel construction could affect the procedure.
Automotive sanding may expose you to dust, coating residue, noise, and contact hazards. Select respiratory protection, eye protection, hearing protection, gloves, and protective clothing according to the materials, tools, ventilation, and exposure assessment involved; one fixed setup is not appropriate for every task.
The practical rule is straightforward: identify the surface and the next coating, choose the least aggressive grit that will do the work, remove each previous scratch pattern before moving finer, and verify the final grade in the coating technical data sheet. If clear thickness, paint type, cure state, or edge safety is uncertain, avoid aggressive sanding and have a qualified refinisher assess the panel.